The FooEvents Calendar includes the ability to convert any post, page, or custom post type into an event and display them in a calendar on your WordPress website.
The FooEvents Calendar plugin can be used on its own without the FooEvents for WooCommerce core plugin installed, however, it will not support ticketing, multi-day, and booking functionality in this scenario.
If you do not have the FooEvents for WooCommerce core plugin installed, please follow these steps to add an event calendar to your WordPress website:
1. Install and configure the FooEvents Calendar plugin #
- Install the FooEvents Calendar on your WordPress website
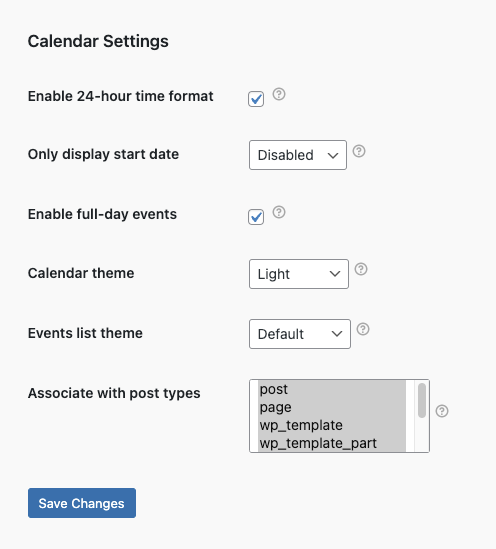
- Navigate to the Calendar Settings in your WordPress admin dashboard. Go to FooEvents > Calendar Settings
- Complete the Calendar Settings as needed. Be sure to select which post types can be set as events in the Associate with post types multi-select box. Selected post types will then display additional event settings such as the event date and can be displayed in the calendar

2. Add event details to a post, page, or custom post type #
- Navigate to any post, page, or custom post type that needs to be displayed as an event in the calendar
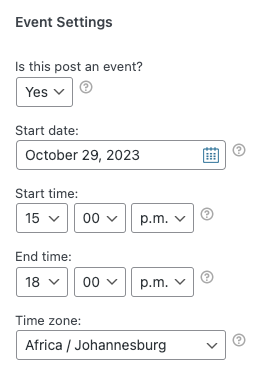
- Scroll down to the Event Settings meta box and complete the event details as needed

- Save the settings and repeat this process for each page, post, or custom post type that needs to reflect as an event in the calendar
3. Embed the calendar on your website #
- Browse to a page or post where you intend to display the calendar
- Add the following short code to display the calendar: [fooevents_calendar]
![Can I use the FooEvents Calendar standalone? 3 Using the [fooevents_calendar] shortocde with the block editor](https://help.fooevents.com/wp-content/uploads/2023/10/Screenshot-2023-10-24-at-12.21.06.png)
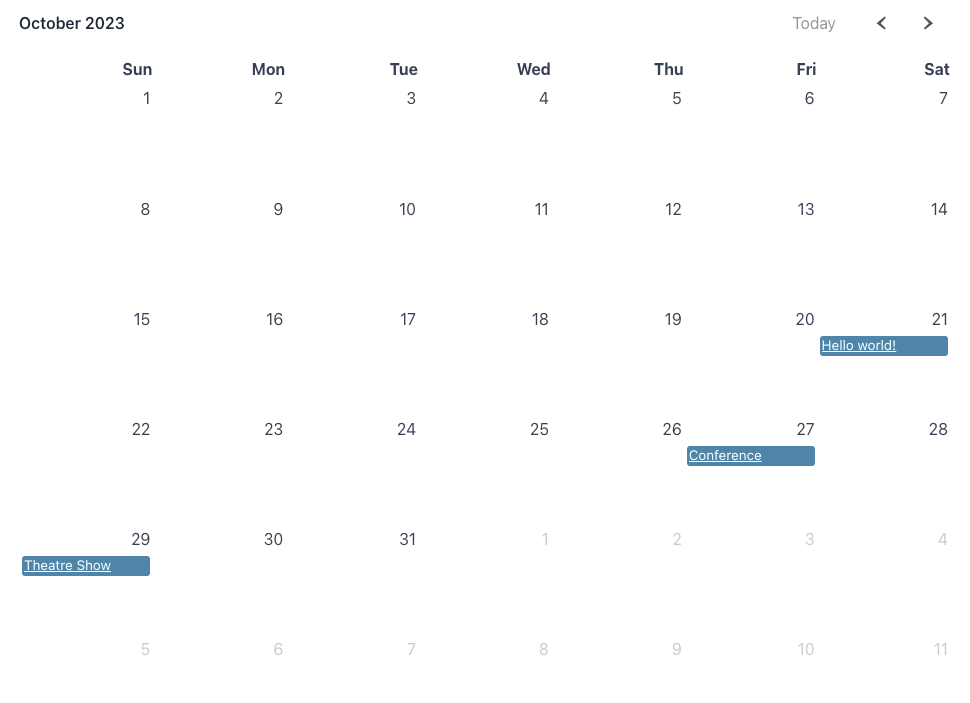
- Save and view the page/post to confirm that the calendar is displaying correctly

- You can further customize the calendar using various short code properties