This getting started with FooEvents guide includes information that you can use to install, use and update the FooEvents plugins on your site. Each section also includes links to more detailed information and instructions.
Sections #
- How FooEvents works
- Purchase a license
- Download the plugins
- Install the FooEvents plugins
- Activate the plugins
- Activate automatic updates
- Configure global settings
- Review default checkout experience
- Create an event
- Sell tickets online
- Sell tickets in-person
- Stationery builder
- Check-ins app
- Event reports
- Export attendees
How FooEvents works
FooEvents is designed to run on WordPress websites that have WooCommerce installed. FooEvents adds additional event and ticketing functionality to WooCommerce making it possible to not only sell standard products (e.g t-shirts, sunglasses, digital downloads) but event products too.
FooEvents adds various event-related options to standard WooCommerce products. When a customer visits an event product page and purchases an item, a ticket is sent to the customer allowing them access to the event. The benefit of this approach is that you can take advantage of all the thousands of extensions, features, themes, and payment gateways available to WooCommerce.
FooEvents consists of a core plugin called FooEvents for WooCommerce. This plugin includes all the essential functionality that makes it possible to sell tickets. We then offer various other extensions that add additional functionality that are not required by every event. This approach ensures you only install functionality that is needed to keep your site lean and bloat-free.
Visit the Event Setup section for a more detailed overview
Purchase a license
Each FooEvents plugin requires a license. An active license will ensure you have access to the following:
- Plugin updates which contain bug fixes, critical security patches and guaranteed compatibility with the latest versions of WordPress and WooCommerce
- Brand-new features and improvements
- Access to the FooEvents Check-ins app which requires a recent version of the plugins
- Help from our technical support team
If you do not have a license you can purchase one here. If you would like to know more about how our pricing and licenses work, please go here
Download the plugins
Once you have purchased a FooEvents license, you will receive an order confirmation email that includes direct download links to the relevant plugin files. You can also download them from the My Account section on the FooEvents Website.
Go to FooEvents.com > My Account > Downloads
Install the FooEvents plugins
You can install the FooEvents plugins via your WordPress dashboard. Go to your WordPress Dashboard > Plugins > Add new. In this section you can upload the zip file that you have downloaded from your email or the “My Account” section on the FooEvents site.
For more detailed instructions, visit the Installing FooEvents plugins section
Activate the plugins
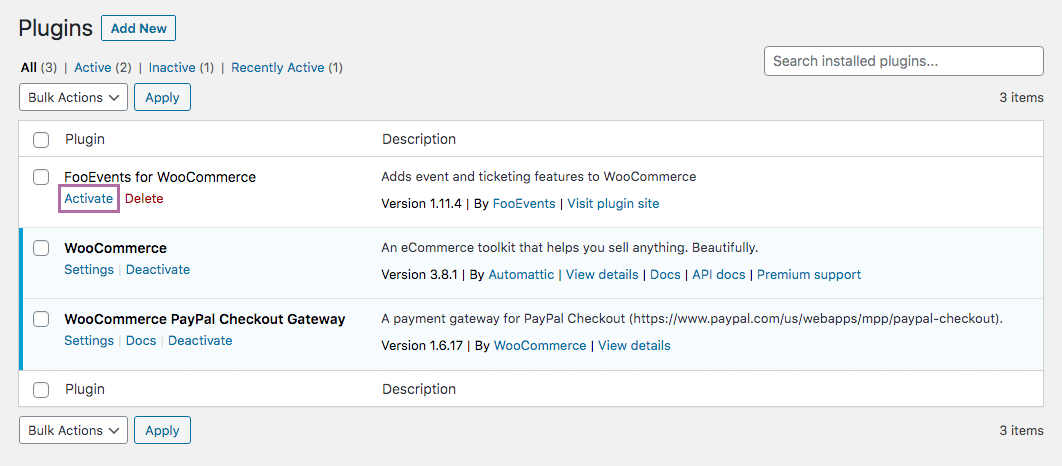
After uploading the plugin you should be able to see it in your plugins list, under WordPress Dashboard > Plugins. Select the activate option.
Activate automatic updates
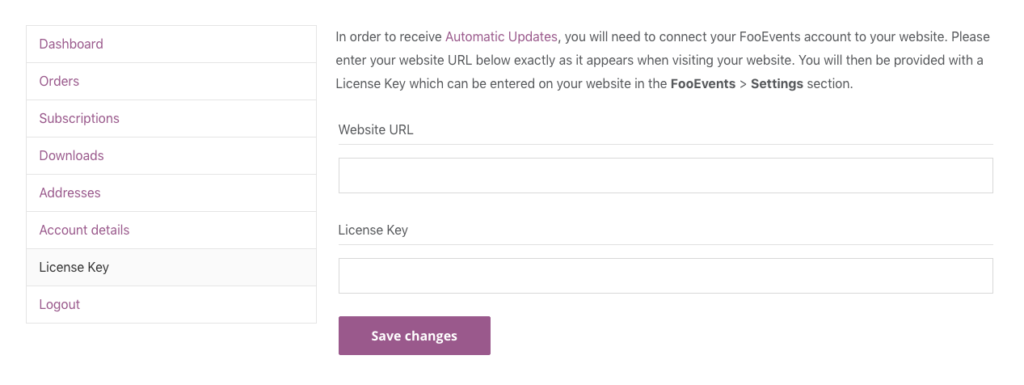
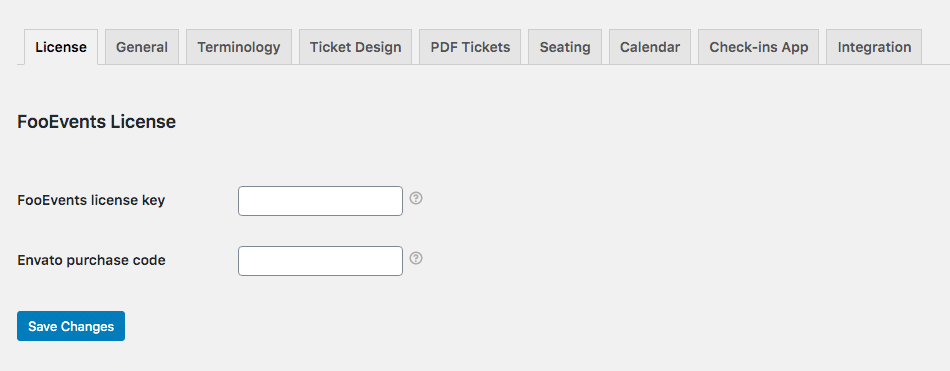
In order to receive automatic updates, you will need to link your FooEvents account and website. To do so, you will need to enter your website URL in the license tab of the My Account section on the FooEvents.com website. You will then be provided with a license key which can be entered on your website in the FooEvents plugin settings.
Visit the Automatic Updates section for detailed instructions
Configure global settings
FooEvents includes various settings that determine how your site will display events and send tickets. You can view the settings in your WordPress Dashboard > FooEvents > Settings. Please note, the tabs illustrated in this screenshot will vary depending on which FooEvents plugins you have installed.
Visit the Global Settings section for a detailed overview of the settings available
Review Default Checkout Experience
If your site uses the classic WooCommerce shortcodes to display the cart and checkout page you can skip this section.
As of WooCommerce version 8.3, when installing WooCommerce on a new site, the WooCommerce installer will automatically generate the Cart and Checkout pages using the WooCommerce Cart and Checkout blocks as the new default experience for all new users. This will replace the classic shortcode-based WooCommerce Checkout and Cart experience.
FooEvents currently only works with the classic shortcode-based WooCommerce Checkout and Cart experience. As such, the attendee section which is displayed on the Checkout page will not display when using the new WooCommerce Cart and Checkout blocks.
We’re currently working on adding support for the WooCommerce Checkout and Cart blocks. Please sign-up to be notified when support for the WooCommerce Checkout and Cart blocks has been added to the FooEvents for WooCommerce plugin.
In the meantime, please follow these instructions in order to revert to the classic shortcode-based WooCommerce Checkout and Cart experience.
Create an event
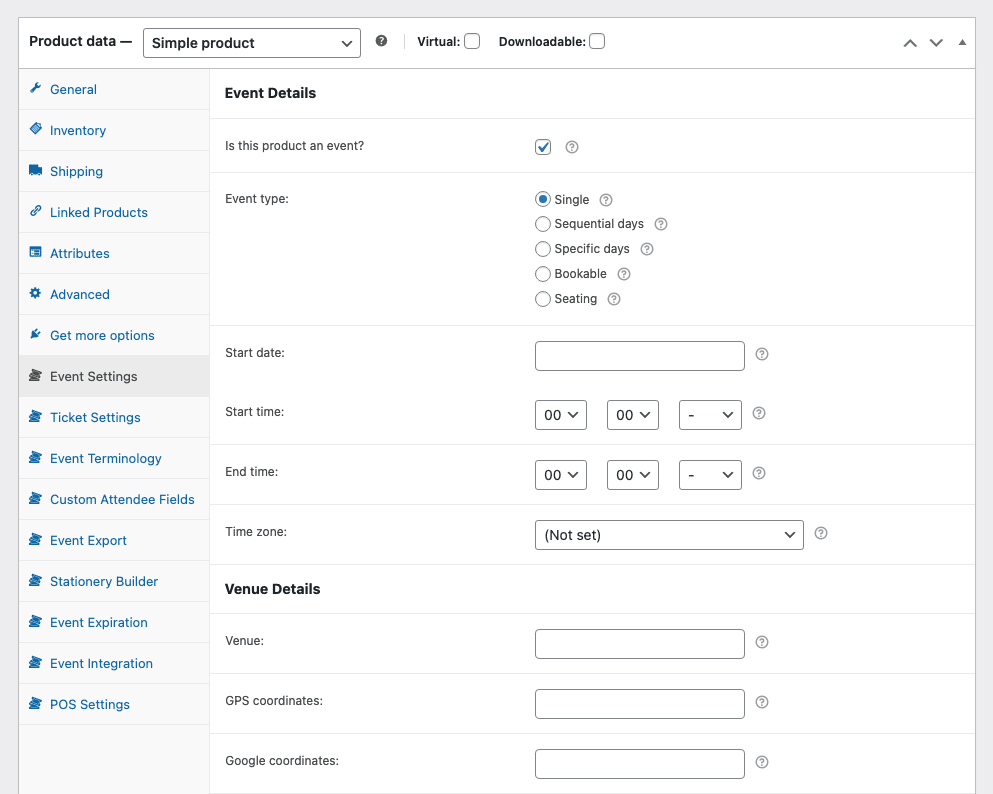
To create an event, go to your WordPress Dashboard > Products > Add New. Here you can set the title of your event and add information about your event such as a description, featured image, image gallery etc. FooEvents adds an event tab to the WooCommerce Product Data settings. The event tab provides various fields that can be used to configure your event and ticket. You can also create different ticket types (e.g VIP, Standard, Student) using WooCommerce attributes and variations.
Once you have configured and published your product/event, customers will be able to visit the product page and purchase tickets to the event. The stock for your product/event will then be reduced based on the number of tickets purchased and a ticket will be sent to the attendees when the order is marked as ‘Completed’ by default unless you have specified a different order status/es.
Visit the Setup an event product section for a detailed overview of the various FooEvents settings
Sell tickets online
When a customer purchases a ticket, a WooCommerce order is created. The information captured relating to the attendee is saved as part of the order meta data, however, the ticket is not generated until payment is received and the order status is changed to ‘Completed’ unless you have specified a different order status/es. If you want the tickets to be emailed automatically, make sure that your product is set to “Virtual” and “Downloadable” in WooCommerce. This will then automatically mark the order as ‘Completed’ when payment is received.
If you are capturing attendee details and would like your attendees to receive the event tickets rather than the purchaser, please make sure that the “Email attendee rather than purchaser?” option is enabled when editing your event. Importantly, if this option is enabled then you must also enable the “Capture attendee full name and email address?” option otherwise the tickets may not be delivered to the attendee
By default, WordPress does not send emails using an authenticated email account. While some WooCommerce emails might get delivered successfully, other emails which contain attachments such as ticket emails are often blocked. To ensure better delivery and reduce the risk of being flagged as spam, try installing a WordPress SMTP plugin such as WP Mail SMTP which allows you to send email via authenticated SMTP accounts such as Gmail, Outlook, Mailgun and SendGrid.
Visit the Ticket Sending section for more details
Sell tickets in-person
You can use the powerful FooEvents POS app to sell and print tickets and passes alongside physical products in-person.
FooEvents POS fully supports all the FooEvents extensions so you can capture custom attendee fields, sell access to multi-day events, offer seating selection or sell bookable slots in-person at the door of your event or business.
Visit the Point of Sale section for more details
Stationery builder
The FooEvents Stationery Builder is included in the FooEvents for WooCommerce plugin and makes it possible to effortlessly design and print custom name tags, wristbands, tickets, badges and personalized labels through an intuitive drag & drop interface.
Visit the FooEvents Stationery Builder section for detailed instructions
Check-ins app
Attendees can be checked-in to your event using the free FooEvents Check-ins app, FooEvents Express Check-ins or directly via the ticket screen in your WordPress dashboard.
Visit the Attendee Check-ins section to learn more
Event reports
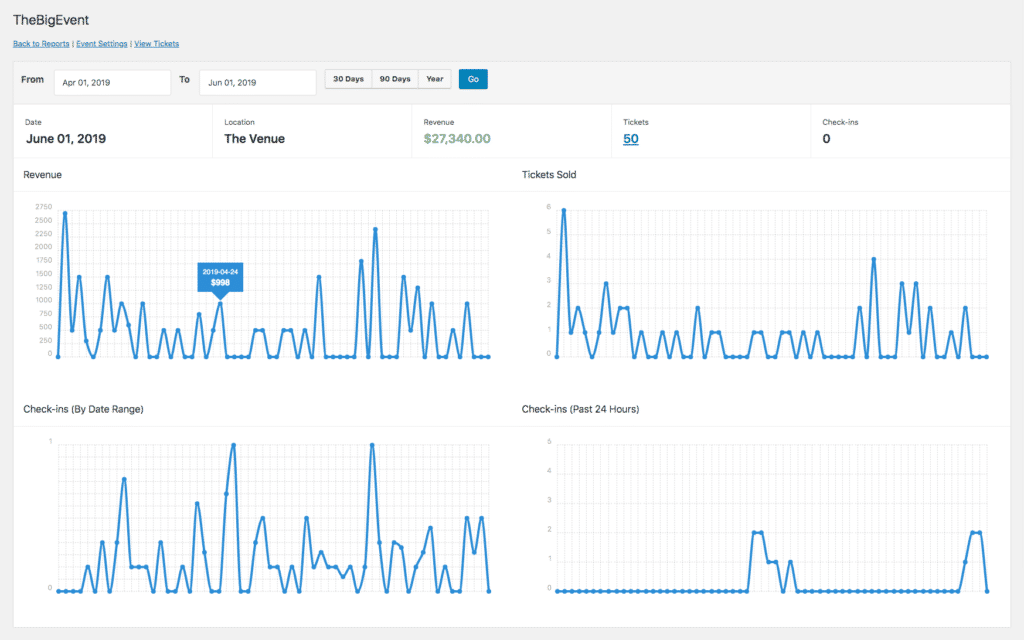
The purpose of the FooEvents Reports feature is to help event organizers get a better understanding of their ticket sales and audience. It includes options to view event revenue, tickets sold, attendee check-ins and available tickets, giving you a good snapshot of event performance.
To view the events listing, go to your WordPress Dashboard > FooEvents > Reports
Export attendees
At any time, you can generate a list of attendees who have been allocated tickets for a specific event.
Follow these instructions to download a CSV export of attendees

