FooEvents has a built-in ticket CSV import tool that can be used to import a large number of tickets for an event. It can also be used to migrate ticket data from a third-party system into FooEvents.
To import tickets, you will first need to install the FooEvents plugin and create an event.
Sections #
Summary
Here is a brief summary of how the import feature works. Once you understand the process, please proceed to the next section for more detailed instructions.
- First, you will need to extract ticket information from your existing system or database and save it as a CSV file. At the very minimum, the CSV will need to include the Attendee First Name, Attendee Last Name, Attendee Email and the ID of the event you would like the tickets to be linked to.
- When your CSV file is ready, you will then need to upload the CSV file using the import tool.
- The import tool will prompt you to ‘map’ the column names in the CSV file to the correct ticket field names.
- Lastly, you will start the import and the tickets will be generated in FooEvents.
Create your tickets
Export your ticket information from your current system or database and create a CSV file that reflects the required information. It is important to ensure that your CSV file is properly formatted and contains all the necessary information. To help you with this, we’ve created a CSV file that you can use as a template, which can be downloaded by clicking on the following link:
Download the CSV template file (ticket-import-example.csv)
Please note, the template includes a custom attendee field (fooevents_custom_vdofravyxwjrtvkaqukh) and booking fields (BookingDateID, BookingSlotID) which are only necessary if you use the FooEvents Custom Attendee Fields plugin and FooEvents Bookings plugin. If you do not use these plugins, you can simply remove the columns and data values from the template file.
Here is an overview of the various field types that can be included in a CSV file:
| Field Name | CSV column name | Description |
| Attendee First Name * | Attendee First Name | This is a required field. If you do not have an attendee name, please provide placeholder text such as ‘Guest’ or ‘NA’. |
| Attendee Last Name * | Attendee Last Name | This is a required field. If you do not have an attendee name, please provide placeholder text such as ‘Guest’ or ‘NA’. |
| Attendee Email * | Attendee Email | This is a required field. Please ensure the supplied email address is a valid email address. When running the import, FooEvents will validate each email address and will only proceed if all provided email addresses are formatted correctly. |
| Event ID * | Event ID | This is a required field. This is the ID of the FooEvents product/event. When importing the ticket, the ID will determine which event the ticket is linked to.
You can find the ID of an event/product by following these instructions:
|
| Variation ID | Variation ID | If your product is a variable product, you will need to specify the relevant variation ID for each ticket. The Variation ID can be seen when viewing the variations in the Product Data Variations tab. |
| Attendee Telephone | Phone | Optional attendee phone number. |
| Attendee Company | Company | Optional attendee company name. |
| Attendee Designation | Designation | Optional attendee designation. |
| Meta field | (your custom field name) | You can import additional custom post meta by adding the fields to your CSV file using a unique plain text field name. When importing, a custom field will be created using the supplied field name and attendee value. Please note, this is a standard WordPress custom fields and not a FooEvents Custom Attendee Field, which is outlined next. |
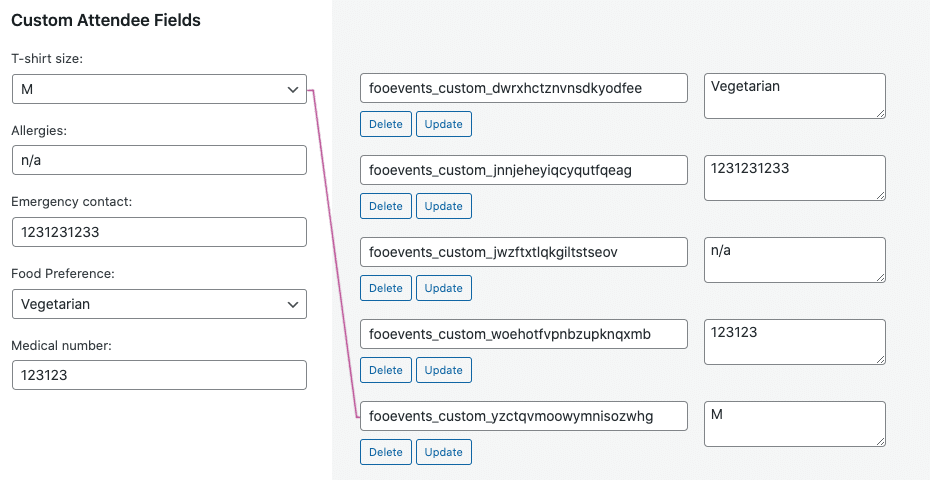
| Custom Attendee Field | (your custom field name/ID) | When importing Custom Attendee Fields, please ensure the CSV column name matches the ID of the attendee field, not the Label. The easiest way to find the ID, is to open an existing ticket in FooEvents and check the Name of the custom attendee field in the ‘Custom Fields’ section with the same Value.
In the following example, the ID of the T-Shirt size custom attendee field is fooevents_custom_yzctqvmoowymnisozwhg. This is the ID that should be used as the column name in the CSV. |
| Booking Date and Slot ID | BookingDateID
BookingSlotID |
When using the FooEvents Bookings plugin, the date and slot of the booking are stored as unique ID values. To link a ticket to a specific booking date and slot, you will need to specify the ID’s of both the booking date and slot.
The easiest way to determine the booking date and slot for a ticket is to open an existing ticket in FooEvents and check the values saved in the WooCommerceEventsBookingDateID and WooCommerceEventsBookingSlotID fields. These values are the booking date and slot IDs. Alternatively, you can find a full list of the booking date and slot ID’s for an event as a serialized array. Go to the bookable event in the WordPress admin area and scroll down to the Custom Fields section. The serialized array is saved as the value of the fooevents_bookings_options_serialized custom field. When generating the CSV, you can either manually copy the date and slot ID’s from the serialized array or you could write a custom script to do so. |
| Order ID | Order ID | You can map new tickets to existing orders by including the relevant order ID in the CSV export.
Tip: If you previously sold access to an event without using FooEvents, you can use the Order ID mapping to generate tickets for those past orders. Simply export your order and attendee information as a CSV file. You can then import the CSV file using the FooEvents Tickets Importer and map the generated tickets to the existing orders. This feature is ideal for retrofitting installations set up with standard WooCommerce or for migrating from another ticketing system. |
Import the CSV file
NB: We highly recommend that you first create a back-up of your current website files and database before proceeding beyond this point and make use of a staging site if possible
Prepare the CSV file similar to the following example.
Please note, this example includes custom attendee fields and booking details, which require additional plugins.
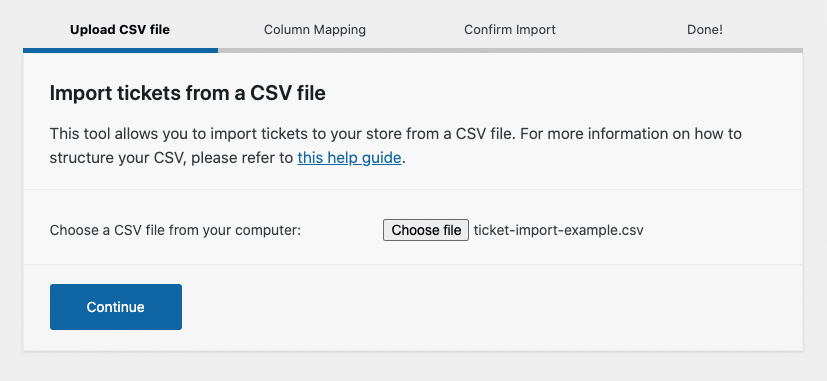
Login to the WordPress admin area and go to Fooevents > Import tickets. Upload the CSV file and press the Continue button and proceed.
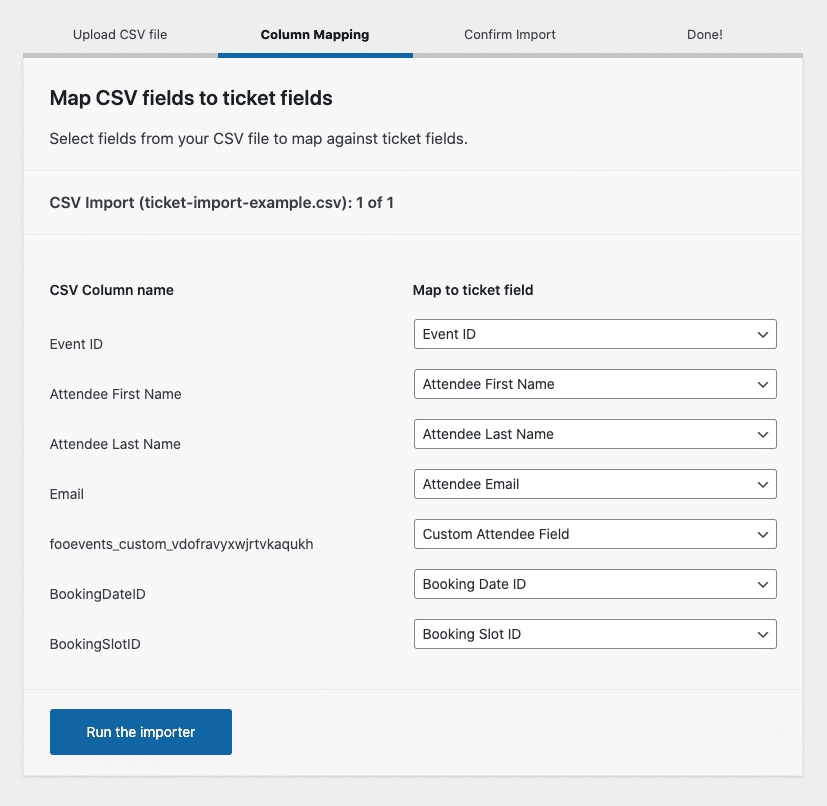
In order to determine which CSV column names need to be used for specific ticket fields, you will need to map the fields before proceeding with the import. To do so, simply assign the appropriate field type in the right-hand column to the CSV field name on the left.
If the column name in the CSV matches a ticket field name (e.g ‘Attendee First Name’ = ‘Attendee First Name’), FooEvents will automatically map the field for you. You can however change the mapping if you need to do so. In our example, the ‘Email’ field was manually mapped to ‘Attendee Field’ while ‘Event ID’, ‘Attendee First Name’ and ‘Attendee Last Name’ were automatically mapped as they matched the ticket fields.
Map the tickets included in your CSV file to the relevant ticket fields and press the Run the importer button.
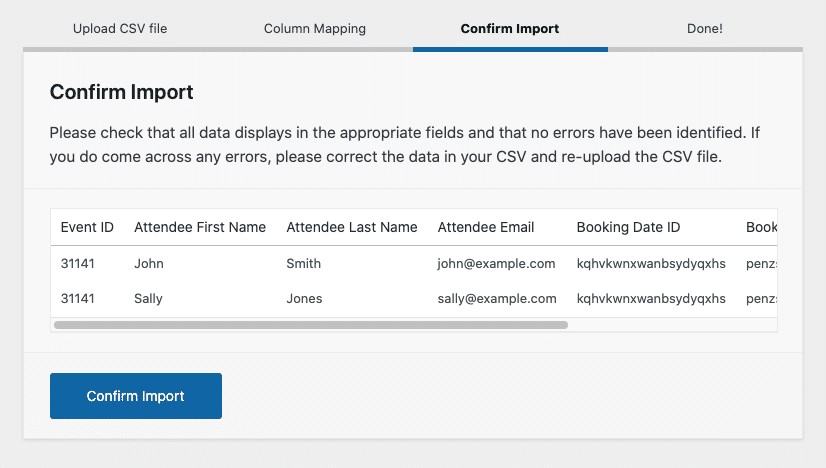
Confirm that all the fields are correct. If any issues are identified when validating the data, please correct the issues in your CSV file and start over the process. Once all fields validate, press the Confirm Import button.
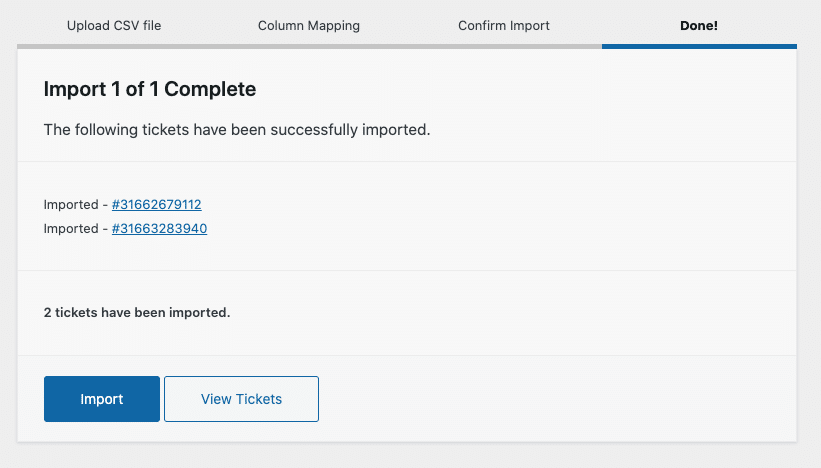
By default, the FooEvents Ticket Importer processes tickets in batches of 100 tickets in order to ensure reliable results. If your CSV file includes more than 100 entries, once you have completed importing the first batch, please repeat the process until all tickets have been imported.
You can increase the batch limit from 100 to 500 by navigating to FooEvents > Settings > General where to you can adjust the Import batch size setting. Depending on your server’s configuration and capabilities, setting a large batch size may cause issues due to server timeouts or memory exhaustion. Adjust this value accordingly to avoid performance issues.
It is very important that you do not alter or rename the import file until this process is completed as this will result in duplication.
Once all of the fields have been imported, you can view the in the FooEvents > Tickets section.

