Scenario
A movie production company needs extras on a movie set:
- There are 100 spaces available which can be reserved for free on their existing WordPress website using WooCommerce
- After reserving their space, the potential extras will be contacted individually to audition before they are approved
- Once they are approved, each extra will receive a ticket containing a barcode via email which will grant them access to a meet-and-greet event with the cast
- The following fields should be captured for each attendee: First name, Last Name, Email, Telephone, short bio outlining acting experience
Here is an example of such an event: Movie Extra (Free RSVP / Waitlist Event)
In this help document, we will outline the exact configuration needed to achieve all of the above requirements.
This help document assumes that you already have FooEvents and WooCommerce installed on a WordPress website and have a basic understanding of how FooEvents works. If you are new to FooEvents, you should read our Getting Started guide to help you get started.
Products Used
Recommended Bundle #
All plugins required to setup these types of events can be purchased individually, however, they are also included in the FooEvents Premium Bundle. This bundle also includes the FooEvents PDF Tickets plugin and FooEvents Multi-day plugin.
Setup
Payment gateway settings #
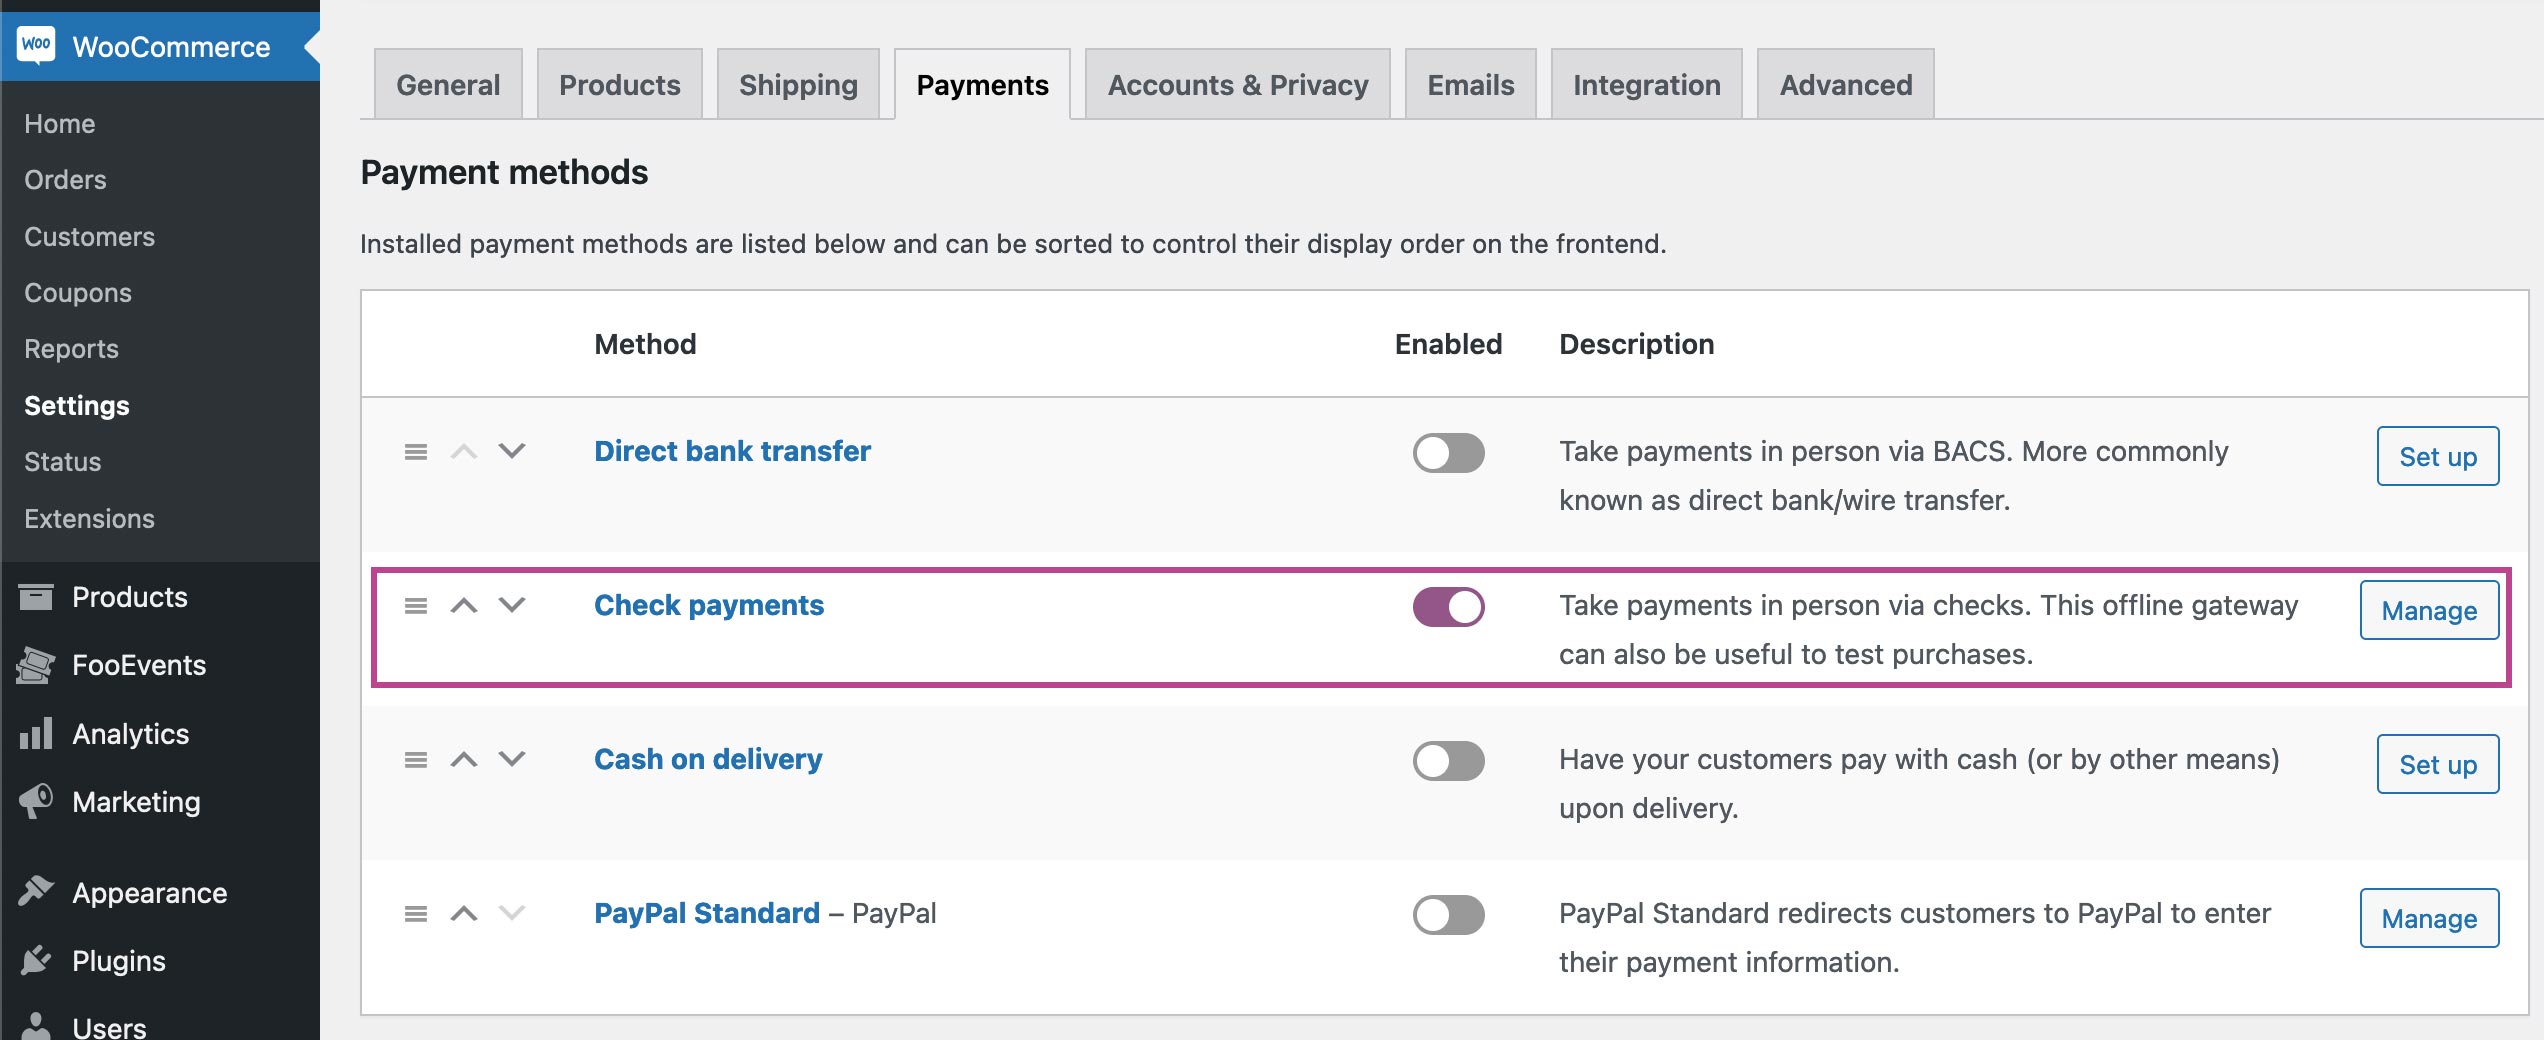
Go to WooCommerce > Settings > Payments.
Enable the ‘Check payments‘ gateway and click on ‘Manage‘.
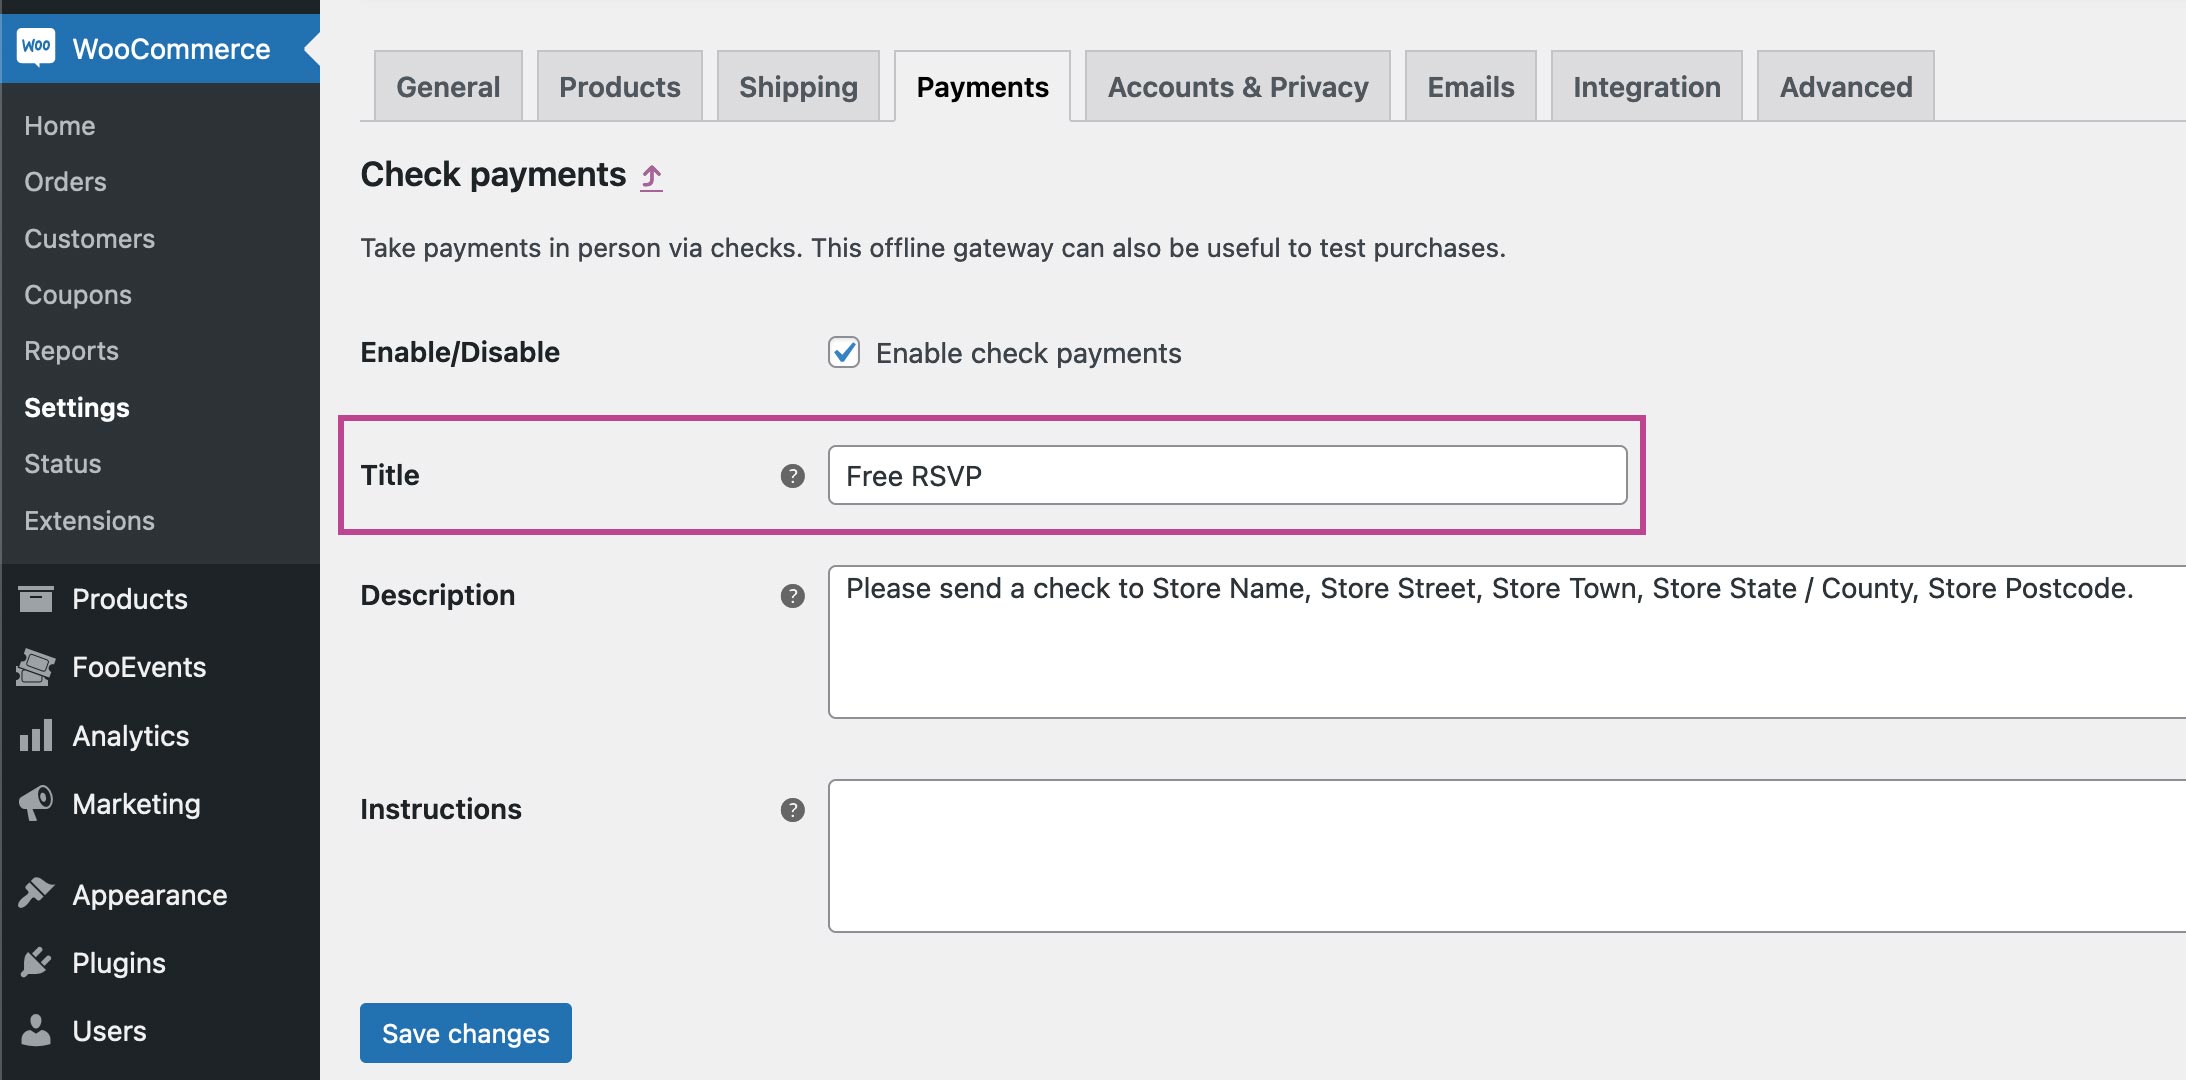
Make the ‘Title‘ field ‘Free RSVP‘ and Save changes.
This setup means that no type of payment will be expected from your customers on the checkout page.
Create an event #
Go to Products > Add Product in the main menu and complete the standard product fields such as the title, body, description, tags, categories, featured image and gallery as needed.
Go to Product Data > General and set the ‘Regular price’ to ‘0’. You can use this code snippet to change ‘0’ to ‘FREE’.
Important: Snippets are provided as a courtesy and do not form part of the FooEvents product offering. They are considered customizations and are not officially supported by FooEvents. As such, we do not provide support for snippets and customizations as per our Terms of Service. Please use them at your own risk
Event Settings #
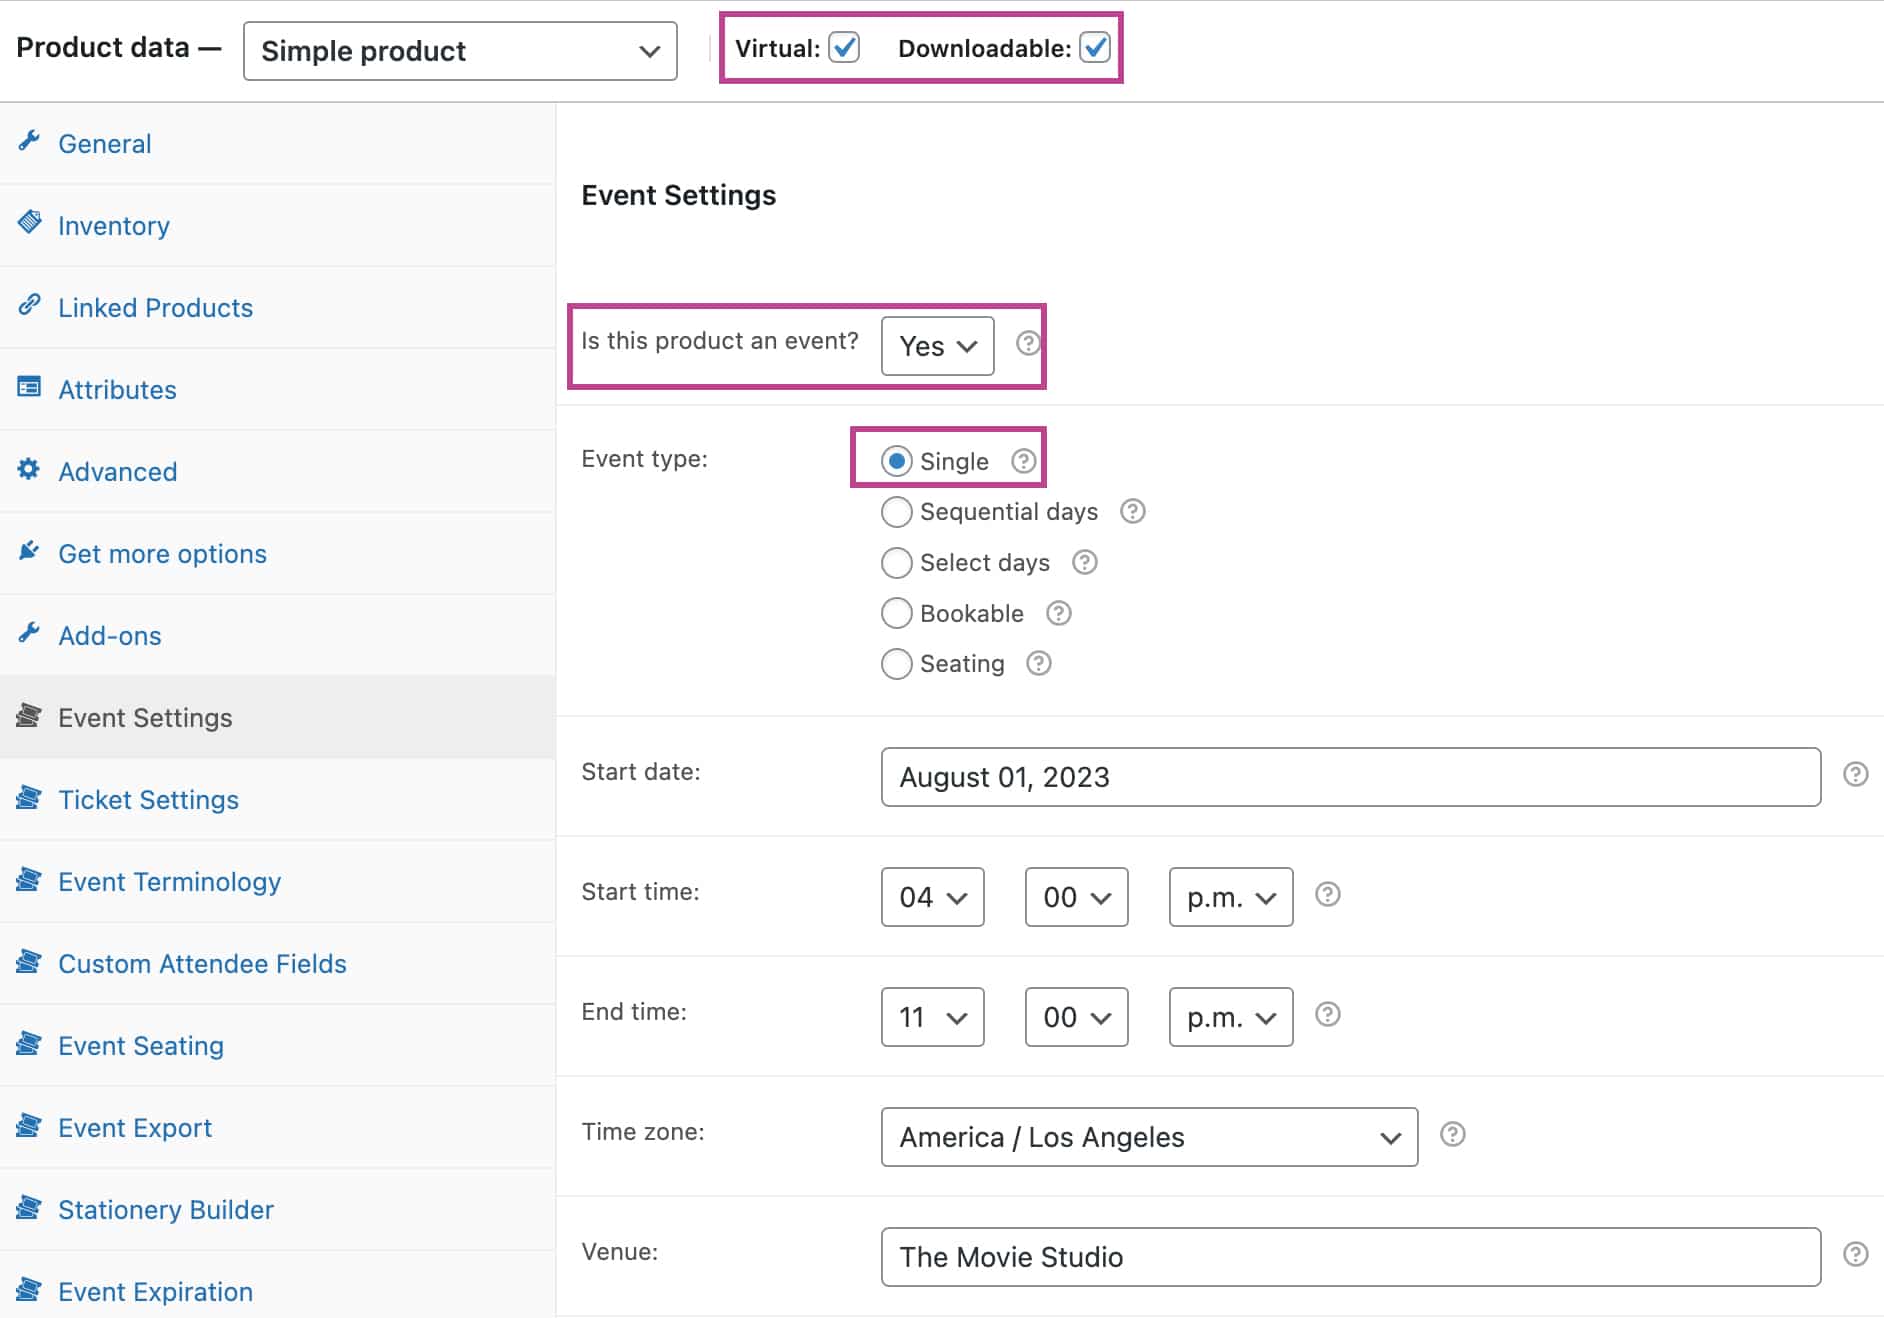
Make your event ‘Virtual‘ and ‘Downloadable‘
Go to Product Data > Event Settings
To activate event functionality, set the ‘Is this product an event?’ drop-down to ‘Yes’.
Set the Event type option to ‘Single‘ and complete the standard event fields as needed.
Enable all of the following options to ensure individual attendee information is captured:
- Enabled – Capture attendee full name and email address?
- Enabled – Capture attendee phone number? (optional)
Settings related to bookings can be ignored and the remaining options can be set based on your preferences.
Ticket Settings #
Go to Product Data > Ticket Settings
Set the relevant ticket theme, logo and header image. You can also change the subject of the ticket email using the Ticket Email Subject field.
If you would like to convey additional information that only attendees will be able to see, you can use the Ticket email body field to achieve this.
Enable the following ticket settings as needed:
- Enabled – Display purchaser or attendee details on ticket?
- Enabled – Display custom attendee details on ticket? (optional)
- Enabled – Display “Add to calendar” option on ticket? (optional)
- Enabled – Attach calendar ICS file to the ticket email? (optional)
- Enabled – Display date and time on ticket? (optional)
- Enabled – Display barcode on ticket? (optional)
- Enabled – Email ticket to attendee rather than purchaser?
- Enabled – Email tickets?
Event Terminology #
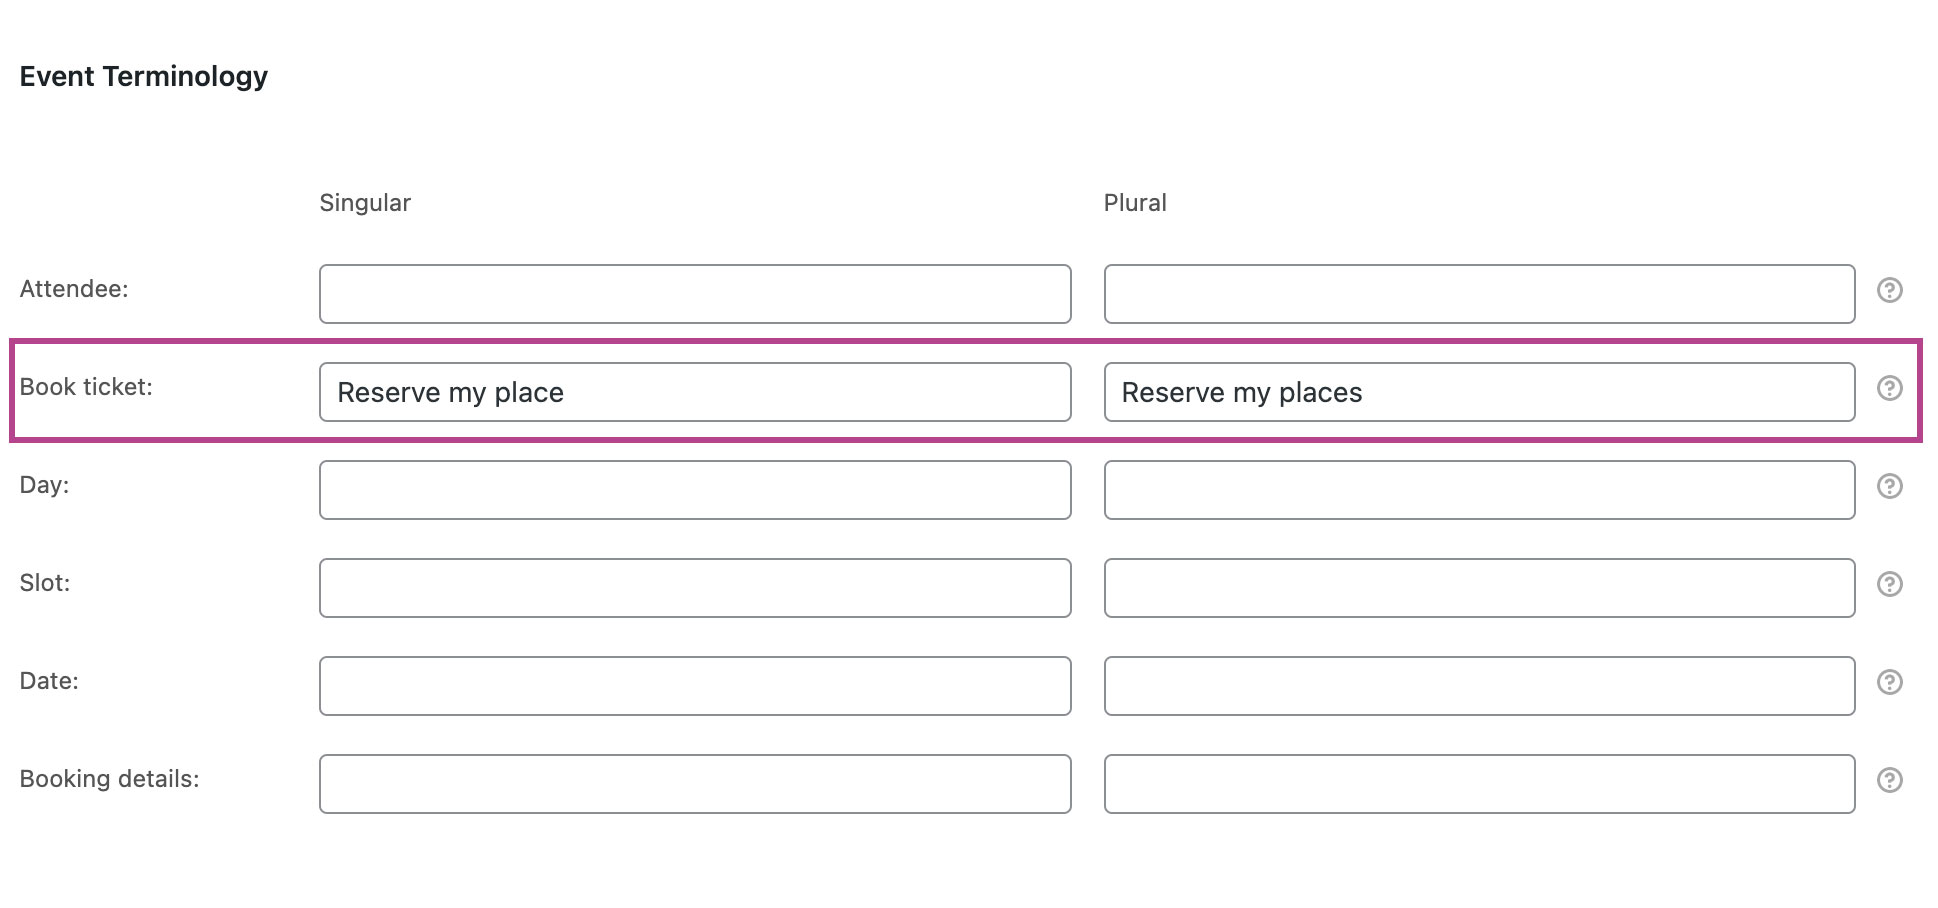
Go to Product Data > Event Terminology
Replace ‘Book ticket’ with something like ‘Reserve my place’ to change the text that displays on the button that potential extras will click to reserve their place.
Custom Attendee Fields #
Requires the FooEvents Custom Attendee Fields plugin.
Go to Product Data > Custom Attendee Fields
Create custom attendee fields as needed. Attendee fields will display on the checkout page and can be completed for each individual attendee. Custom attendee fields will also be displayed in the attendee’s ticket information which can be viewed in the WordPress admin area and the FooEvents Check-ins apps.
Once you have reviewed all the settings, you can Save and Publish your event. It should then be visible on the front-end of your website.
Additional settings #
You can use the Direct Checkout for WooCommerce plugin which allows your customers to skip the “Cart” page and go directly to the “Checkout” page.
Usage
Potential movie extras should now be able to reserve a place by visiting the “Movie Extras” page and clicking on “Reserve my place“. They can then proceed to the checkout page where they will be required to complete the relevant billing information and attendee fields.
Tickets #
The order will be Completed automatically, in which case a ticket will be generated and sent to each individual attendee. Based on the settings that were enabled, the ticket will include all the captured attendee information.
The ticket can also be viewed in the WordPress admin area. Go to your WordPress admin area > FooEvents > Tickets and select the relevant ticket.
Exporting Attendees #
You can export a CSV file for each event which includes all ticket numbers, custom attendee fields, check-in data, purchaser and attendee details. The CSV can then be imported into your CRM system.
Alternatively, you can use a solution such as WP Fusion, which offers an integration with FooEvents that allows you to dynamically add event attendees as contacts to your CRM of choice. You can also optionally apply tags based on the event ticket purchased.
Attendee Check-ins #
The Status of a ticket can be changed from Not Checked In to Checked In, Canceled or Unpaid. This can be done by editing the ticket in the WordPress admin area, using the FooEvents Express Check-ins plugin or by using the free FooEvents Check-ins app (most popular choice).
Printing name tags #
The built-in FooEvents Stationery Builder makes it possible to effortlessly design and print custom name tags, wristbands, tickets, badges and personalized labels through an intuitive drag & drop interface.
Creating a free variation that is only visible to admin
In some cases you might need one event with variations for the normal ticket type and another variation for a free ticket type. An example of this might be complimentary tickets that are only available to sponsors or VIPs.
You can hide the “Free ticket” variation from the front-end so that customers won’t be able to select it. To do so, you can add a CSS snippet to your theme’s custom CSS file that looks like this:
.variations_form option[value="Free ticket"] {
display: none;
}


