Scenario
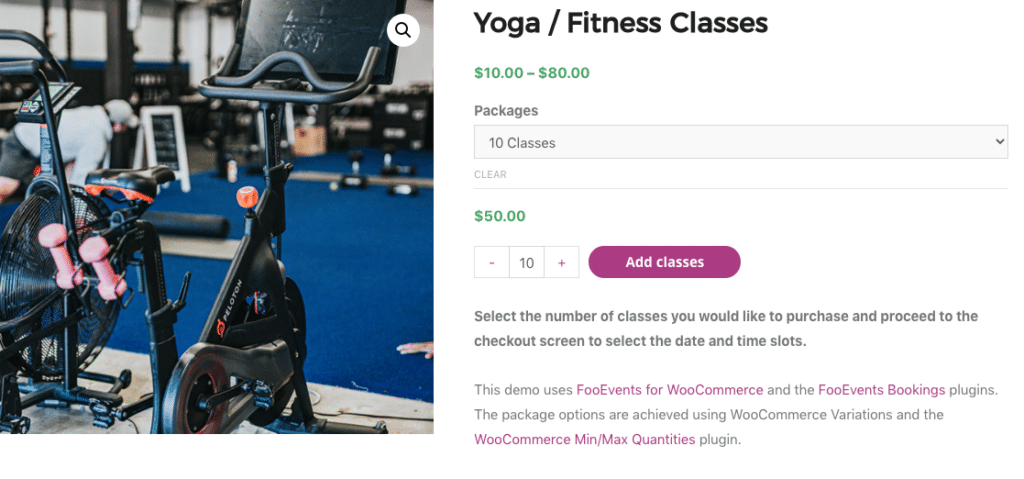
A fitness studio would like to sell access to Yoga classes via their website. Customers will need to have the option to purchase single classes or packages for multiple classes at reduced rates (1 class, 5 classes, 10 classes and 20 classes).
When an attendee purchases a ticket, the following must occur:
- Each class must be limited to 50 spots.
- Each class must be available at multiple time slots throughout the day.
- The purchaser must select a package that will determine the cost per class.
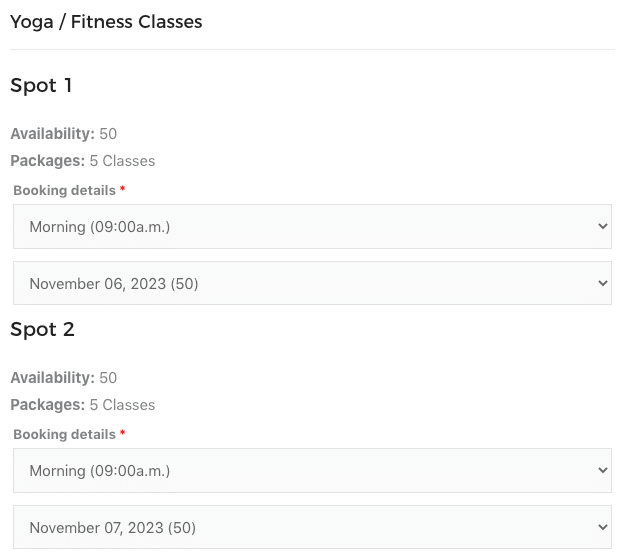
- The purchaser must select the time and dates they would like to attend.
- Tickets must be sent to the purchaser.
Here is an example of such an event: Yoga / Fitness classes
This help document assumes that you already have FooEvents and WooCommerce installed on a WordPress website and have a basic understanding of how FooEvents works. If you are new to FooEvents, you should read our Getting Started guide to help you get started.
Products Used
Setup
Create an event #
Go to Products > Add Product in the main menu and complete the standard product fields such as the title, body, description, tags, categories, featured image and gallery as needed.
General #
Go to Product Data and select Variable Product from the Product Type dropdown.
Attributes and Variations #
Next, we need to create product variations that will allow customers to choose between the following package options:
- Single class – $10
- 5 Classes – $30
- 10 Classes – $50
- 20 Classes – $80
The customer will be charged different amounts depending on the package they select.
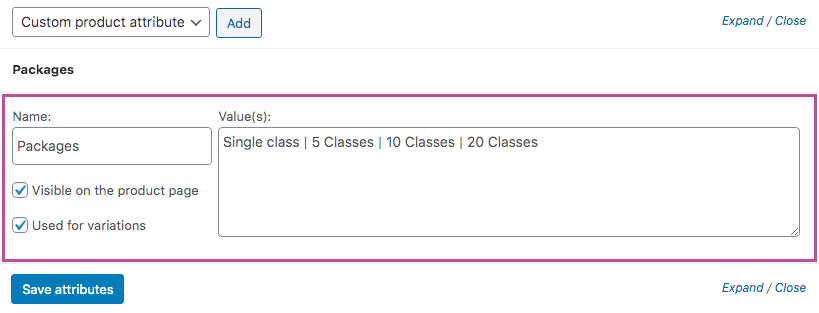
Go to Product Data > Attributes and create an attribute called ‘Packages’. In the Values field, specify the different options. Be sure to check the Used for Variations option and click Save Attributes.
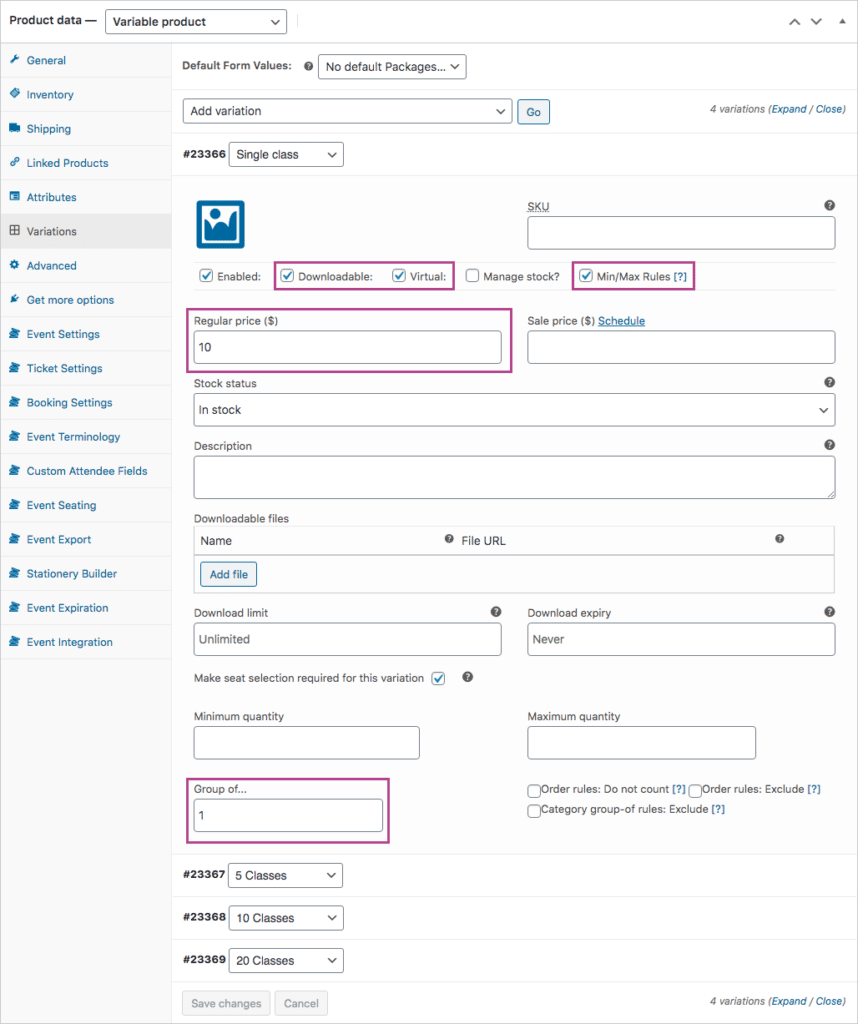
Go to Product Data > Variations. Use the Create Variations from all Attributes option to generate the variations. Set each variation to Virtual and Downloadable and set the relevant price. Stock will be managed by FooEvents Bookings, so make sure that the Manage Stock checkbox remains disabled.
Depending on the package selected by your customer, the stock quantity should increment in different groups/intervals (e.g 1, 5, 10 or 20). This will be achieved using the WooCommerce Min/Max Quantities plugin. Enable the Min/Max Rules option and Update the product in order for the Min/Max Quantities options to display. For each package, set the number of stock/classes to add for the package using the Group of fields (i.e. 1, 5, 10 or 20). When adding a variation to a cart, the stock will increment by this value.
Event Terminology #
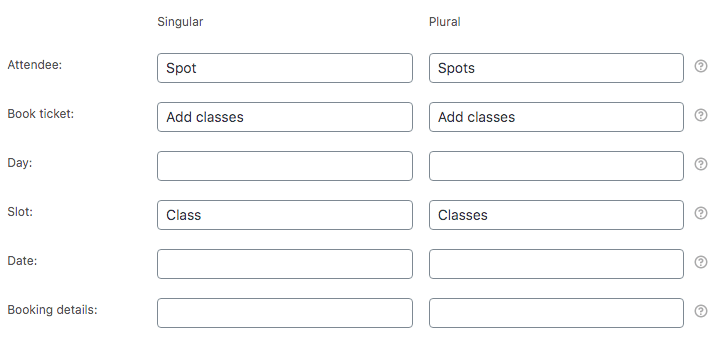
Go to Product Data > Event Terminology. In this section, you can change the terms used to describe your event.
Event Settings #
Go to Product Data > Event Settings
To activate event functionality, set the ‘Is this product an event?’ dropdown to ‘Yes’.
Set the Event type option to ‘Bookable‘ and complete the standard event fields as needed.
The following settings can be changed as needed, but for the purpose of this demo, we have set them as follows.
- Disabled – Capture attendee full name and email address? (important)
- Disabled – Display booking slots and dates on product pages? (important)
- Disabled – Hide booking time in slot drop-down? (optional)
- Disabled – Hide stock availability notice? (optional)
- Enabled – Show stock availability in the date and slot drop-downs? (optional)
- Enabled – Show out of stock booking dates? (optional)
Ticket Settings #
Go to Product Data > Ticket Settings
The tickets that the customer will receive when signing up will act as confirmation that the spots have been booked.
You can change the subject of the ticket email using the Ticket Email Subject field.
If you would like to convey additional information that only the customers will be able to see, you can use the Ticket email body field to achieve this.
Enable the following ticket settings:
- Enabled – Display purchaser or attendee details on ticket? (optional)
- Disabled – Display custom attendee details on ticket?
- Enabled – Display “Add to calendar” option on ticket? (optional)
- Enabled – Attach calendar ICS file to the ticket email? (optional)
- Enabled – Display date and time on ticket? (optional)
- Enabled – Display barcode on ticket? (optional)
- Enabled – Display price on ticket? (optional)
- Enabled – Display booking details on ticket? (optional)
- Disabled – Email ticket to attendee rather than purchaser? (important)
- Enabled – Email tickets?
Bookings Settings #
Go to Product Data > Bookings Settings
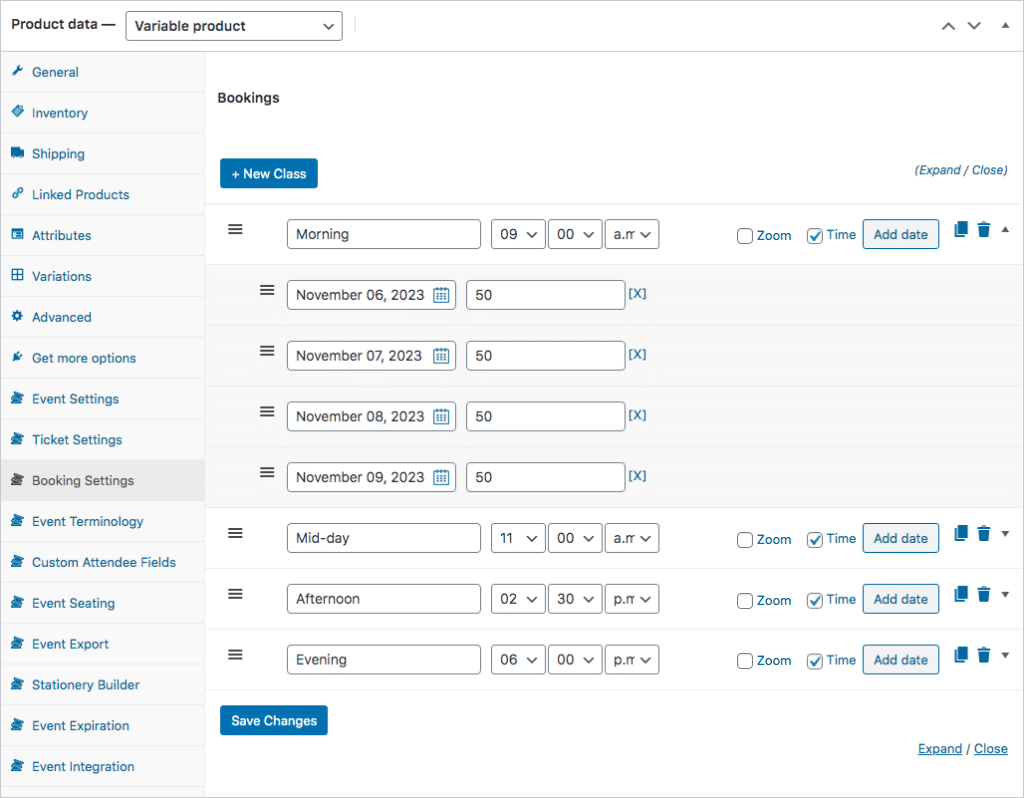
Create a slot/class for each time slot that the class is offered and specify the dates each slot is available. Set the stock availability to 50. This is the number of available student spots per class.
You can now Save and Publish your event.
Usage
Customers can select a suitable package and proceed to checkout.
At checkout, customers can select the booking time and date for each spot that they purchased.
Once the order has been completed, the customer will receive a ticket email for each spot that contains all the relevant booking and event information.
Attendee Check-ins using the FooEvents apps #
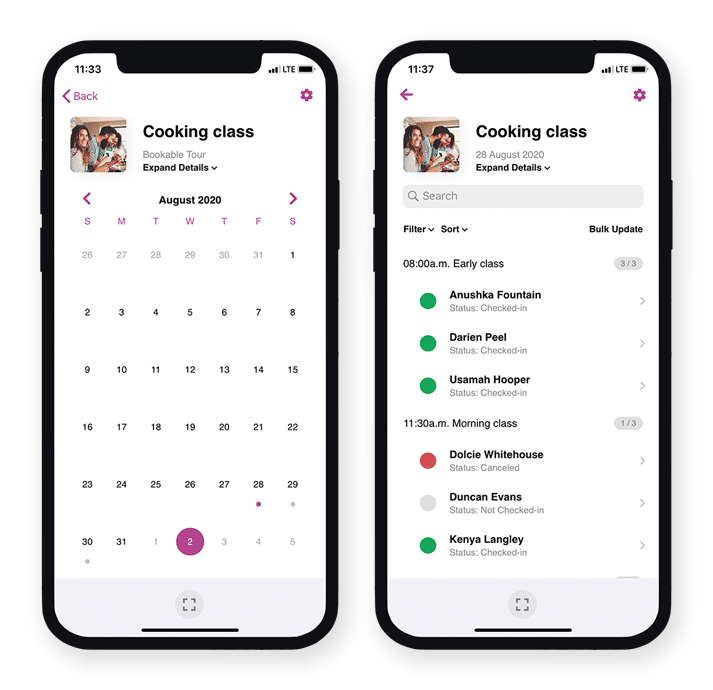
You can manage booking attendance using the free FooEvents Check-ins app. Bookable events function differently to other events when viewed in the app and make use of custom screens that make managing bookings a breeze. Ticket barcodes can also be scanned within the app to speed up the check-in process.
Questions and Feedback
Have a question before you buy? Please get in touch
Already purchased and need assistance? Contact our support team
