Depending on the nature of your event, you may need to provide attendees with access to exclusive content on your website. The built-in WordPress password protect feature makes it fairly simple to limit access to posts and pages using passwords. When enabled, this option replaces the page’s content with a password text field. The correct password must be entered in order to reveal the contents of the page.
Example page: https://demo.fooevents.com/password-protected-page/
Password: Foo3vents
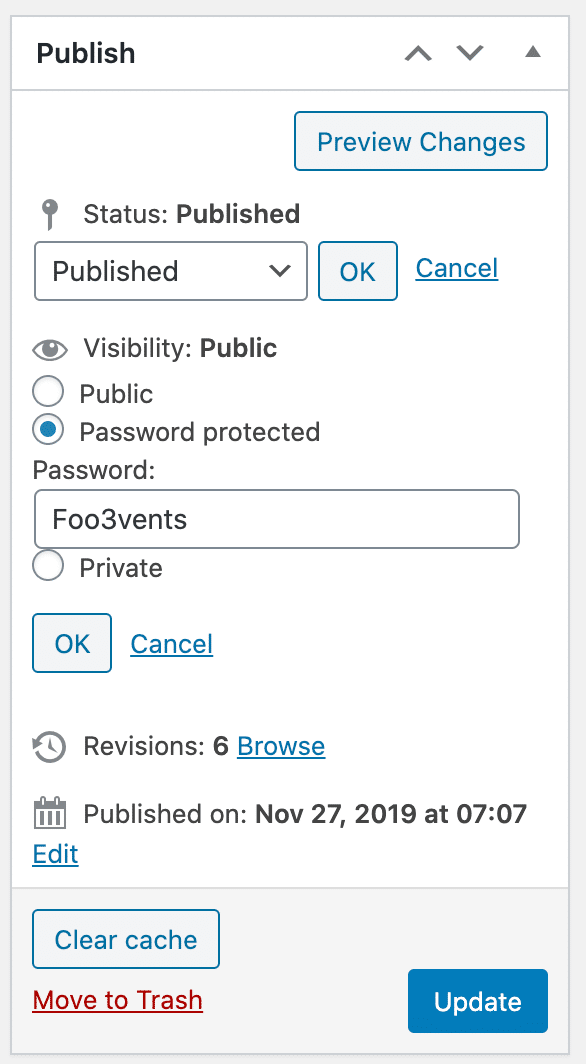
- When editing a page or post, select the Edit link next to Visibility in the Publish sidebar
- Select the Password protected radio button
- Enter a password and click the OK button
- Update the post or page
WordPress stores the password in a browser cookie so your attendees will not need to re-enter passwords if they visit the same page or post multiple times.
If you use the same password for multiple pages or posts, the user will not need to re-enter the password for each separate page. WordPress only tracks one password per session so if an attendee visits two posts or pages that use different passwords, they will need to re-enter the password for the post with a different password.
Add the password to your ticket emails #
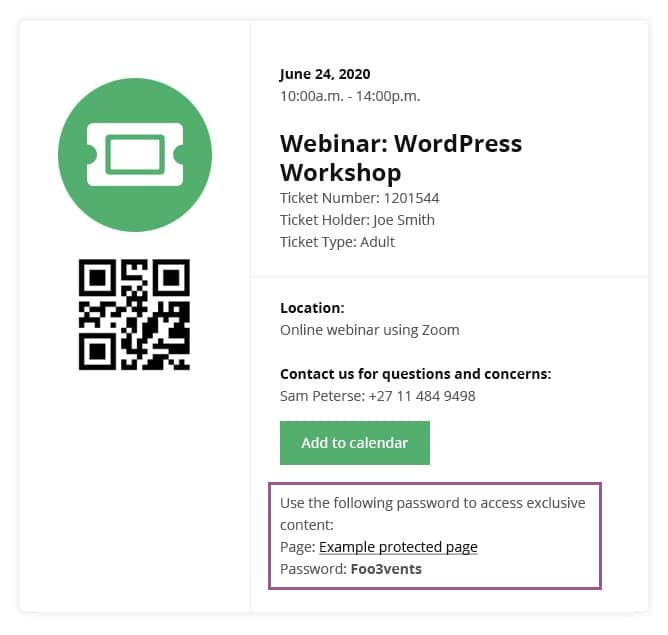
You can share the password with your event attendees by including the password and related instructions in the ticket. The Ticket email body field is not displayed to the public on your website and is ideal for sharing information such as this.
Here are the steps to add content to the Ticket email body:
- Login to your WordPress admin area
- Browse to Products > Add/Edit Product in the main menu
- Go to the Product Data tabs and select Ticket Settings
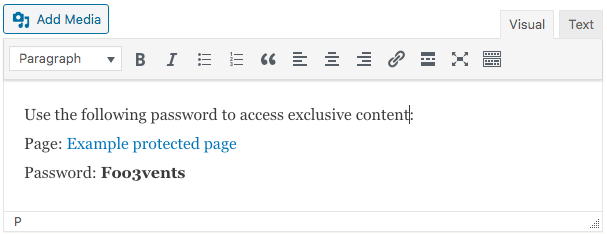
- Scroll to the Ticket email body field and enter the password and any instructions
- Save the product


