FooEvents POS integrates directly with the Stripe Reader S700, Stripe Terminal BBPOS WisePOS™ E and Verifone P400 smart readers and supports manual card entries to capture in-person card payments.
Sections #
- Requirements
- Setup
- Stripe Reader Locations
- Stripe API Keys
- Plugin Settings
- Stripe Reader Registration and Pairing
- Processing Payments
- Processing Payments Manually
- Refunding an Order
Requirements
The following are required for the Square payment integration:
-
- FooEvents POS plugin activated and installed on your website
- Stripe account where the currency matches the currency of your WooCommerce store
- Stripe Reader S700, Stripe Terminal BBPOS WisePOS™ E or Verifone P400 smart reader
- Note: Readers can be ordered directly from Stripe through your Stripe Dashboard
Readers are currently available only to Stripe customers in Australia, Austria (beta), Belgium, Canada, Czech Republic (beta), Denmark, Finland (beta), France, Germany, Ireland, Italy, Luxembourg (beta), Malaysia (beta), Netherlands, New Zealand (beta), Norway (beta), Portugal (beta), Singapore, Spain, Sweden, Switzerland (beta), United Kingdom and the United States, however, you do not need a smart reader for manual card payments
Setup
In order for FooEvents POS and Stripe to be able to communicate with each other, you will need to create at least one Stripe Reader location and also obtain your Publishable key and Secret key from your Stripe Dashboard.
Stripe Reader Locations
In order to register and use a Stripe Reader S700, BBPOS WisePOS™ E or Verifone P400 smart reader or the Stripe Manual Payment option to process payments at checkout, you will need to add at least one location to your Stripe Dashboard. To add a Stripe location, login to your Stripe Dashboard and navigate to Payments > Readers > Locations
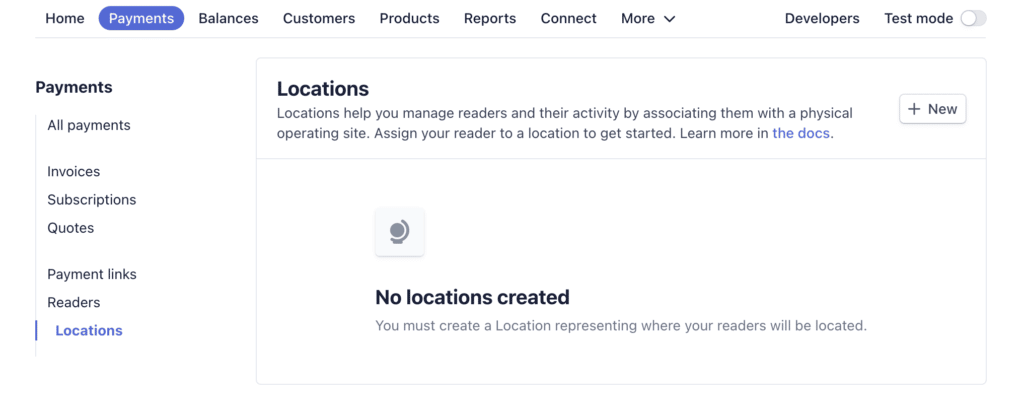
Click on the New button to add your first Stripe location by providing a name and address for the location.
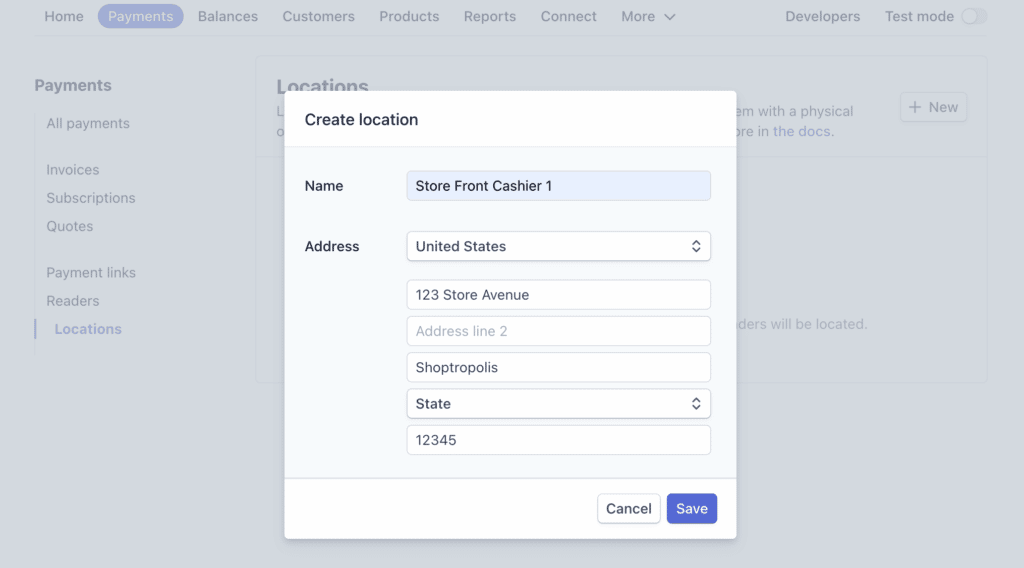
Click the Save button to add your new location. You can now edit the location details by clicking on the location from your dashboard. If you would like a custom splash screen to display on your BBPOS WisePOS™ E or Verifone P400 smart reader, once you connect it to FooEvents POS, you can click on the location’s Reader settings button.
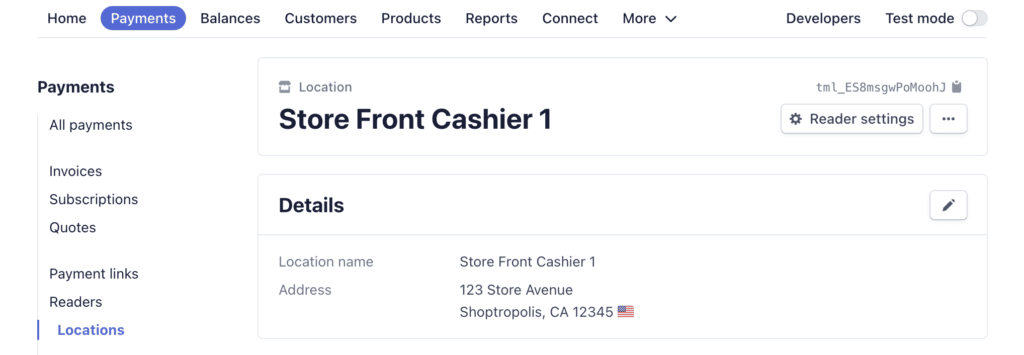
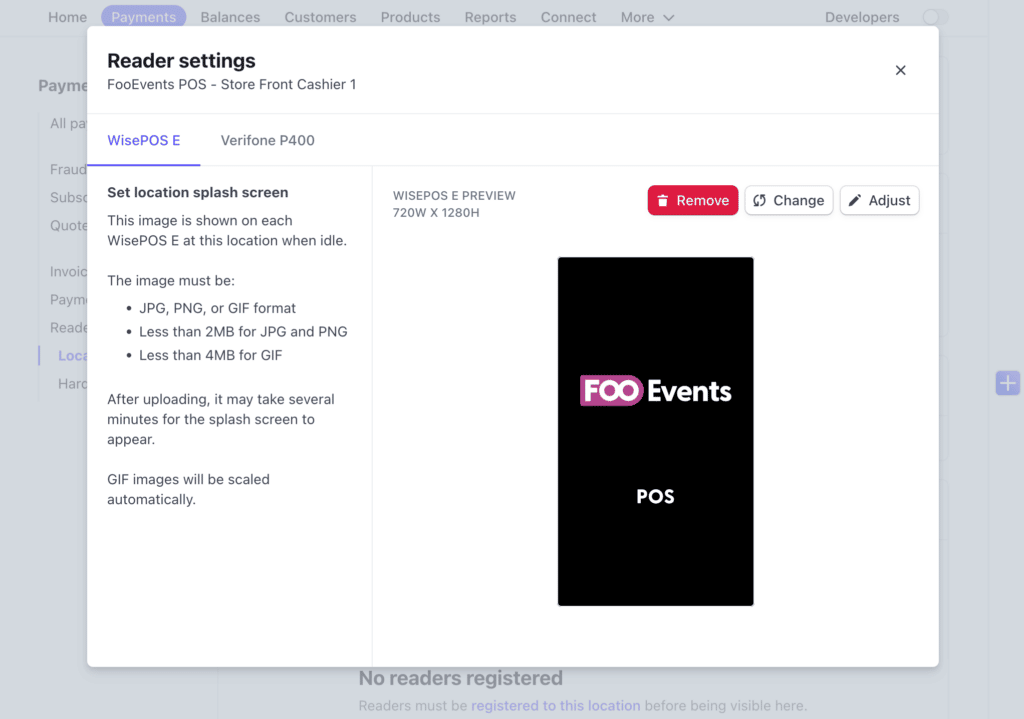
By default, Stripe will display its own splash screen on the reader when it powers up and connects to your account. Click the Upload new button to upload your custom 720 W x 1280 H (BBPOS WisePOS™ E) or 320 W x 480 H (Verifone P400) image to use as the splash screen instead.
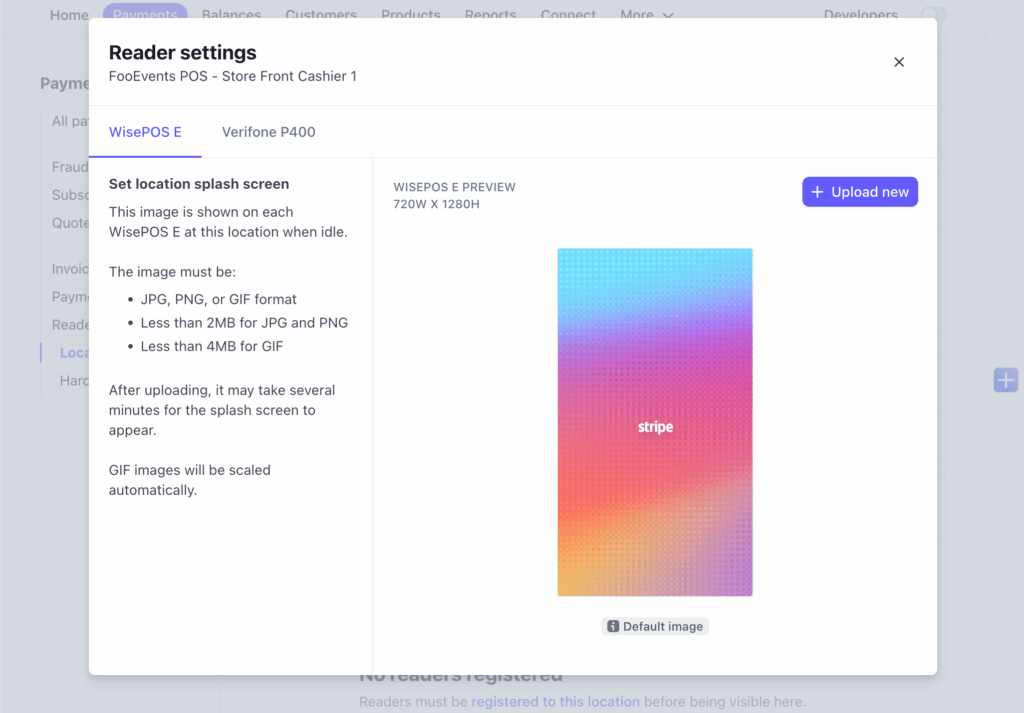
Once you have uploaded your custom image, you can adjust its size to your liking and then close the dialog. When FooEvents POS connects to your reader for the first time, your custom splash image will display after a short while and then remain the splash image until you either remove your custom image or upload a new one.
Stripe API Keys
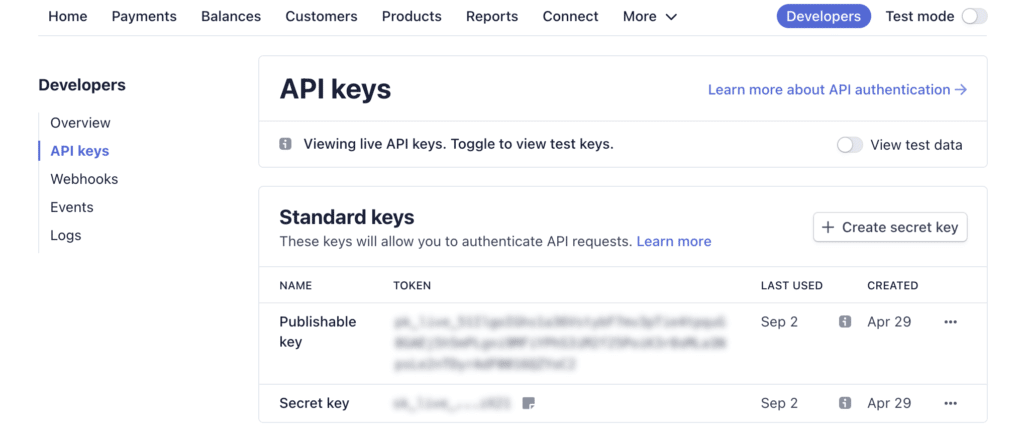
You can view your Stripe API keys by logging in to your Stripe Dashboard and navigating to Developers > API keys. Note: For more detailed instructions and information, please refer to Stripe’s API keys documentation.
Live API Keys #
Once your Stripe account is setup and verified, you will have access to your live API keys which can be used to process real cards at checkout.
Test API Keys #
If you haven’t verified your Stripe account yet and would like to use a test credit card to test the integration, you can set your Stripe account to use test data by toggling the Viewing test data switch which will generate test API keys for you to use.
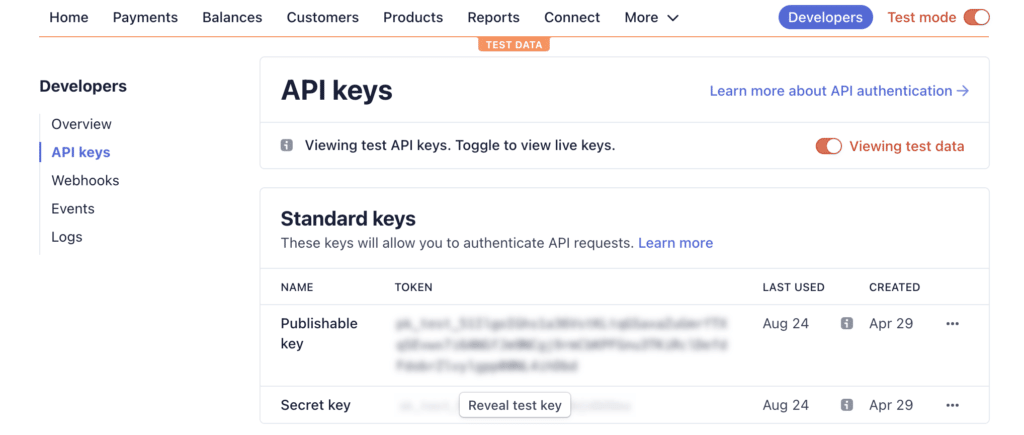
You will then be able to use one of Stripe’s test card numbers at checkout in FooEvents POS (note: real cards don’t work while in test mode).
Plugin Settings
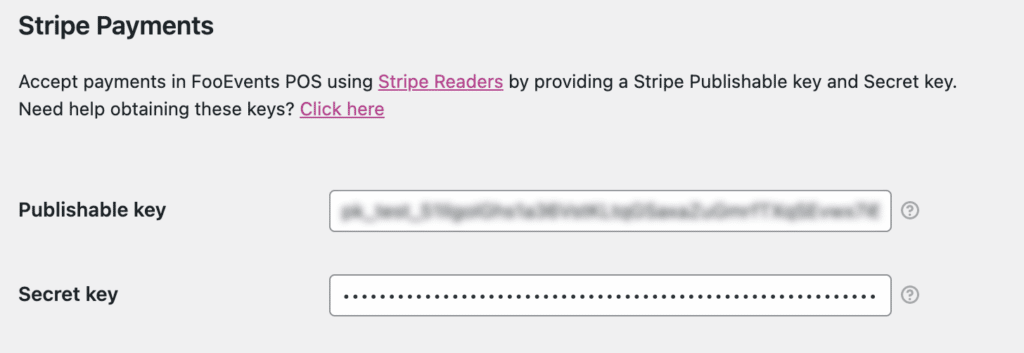
After copying your live Publishable key and Secret key, navigate to your WordPress dashboard and open the FooEvents POS plugin settings. On the Integration tab under Stripe Payments, paste your live Publishable key and Secret key, then save your settings and you’re good to go!
Stripe Reader Registration and Pairing
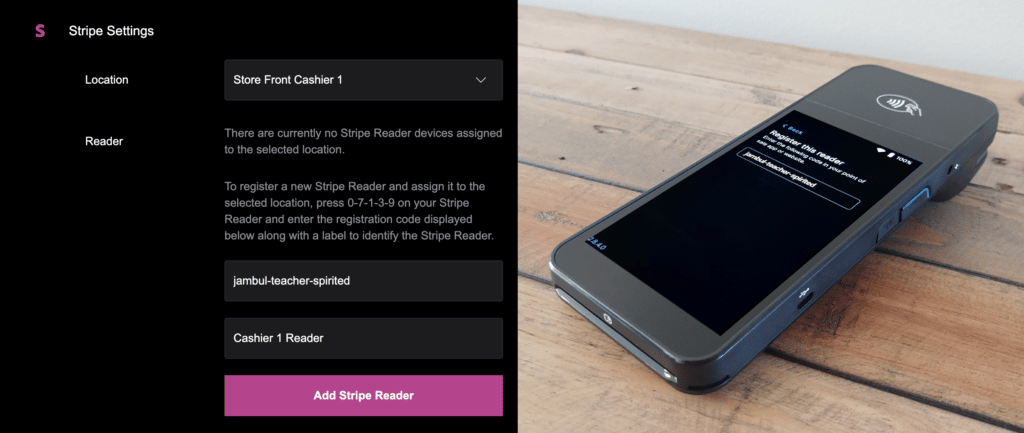
In order to process a payment at checkout using either the Stripe Reader S700, BBPOS WisePOS™ E or Verifone P400 smart reader, you will need to register or pair the reader device with the FooEvents POS app. Open the FooEvents POS Settings screen in the app and scroll down to Stripe Settings. Here you will be able to choose which Stripe location should be associated with the device that you would like to use with the FooEvents POS app.
BBPOS WisePOS E Registration #
In order to register a BBPOS WisePOS™ E reader and assign it to the chosen location, you will need to do the following:
- Swipe from the left side of the screen to show the slide-out panel
- Tap the Settings button on the slide-out panel
- Enter 0-7-1-3-9 as the admin PIN
- Tap the Generate Pairing Code button to generate a registration code
Enter the registration code and provide a custom label in order to easily identify the reader in your Stripe Dashboard. Press the Add Stripe Reader button to register the reader and add it to the chosen location.
Verifone P400 Registration #
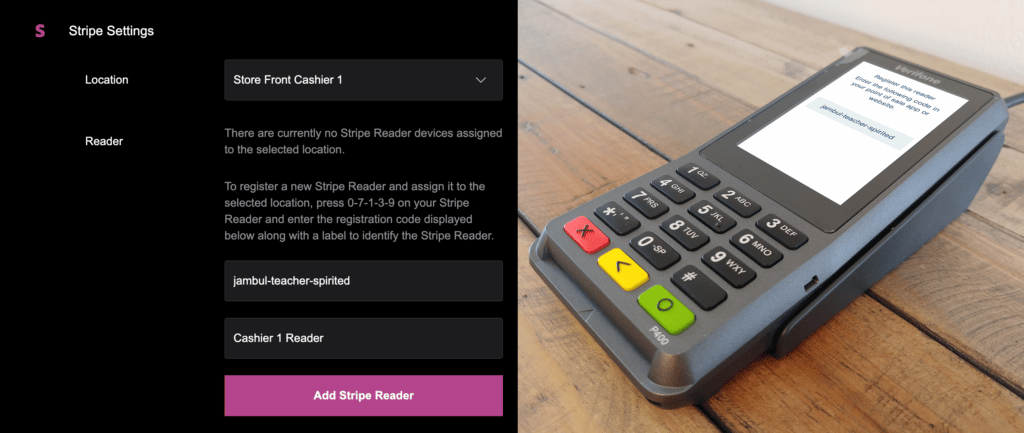
Please note: Stripe recommends connecting production deployments to the merchant network through router networking using an ethernet cable as opposed to using WiFi, which might be unreliable at times when using the Verifone P400 reader. In order to register a Verifone P400 reader and assign it to the chosen location, you will need to press 0-7-1-3-9 on the device to generate a registration code. Enter the registration code and provide a custom label in order to easily identify the reader in your Stripe Dashboard. Press the Add Stripe Reader button to register the reader and add it to the chosen location.
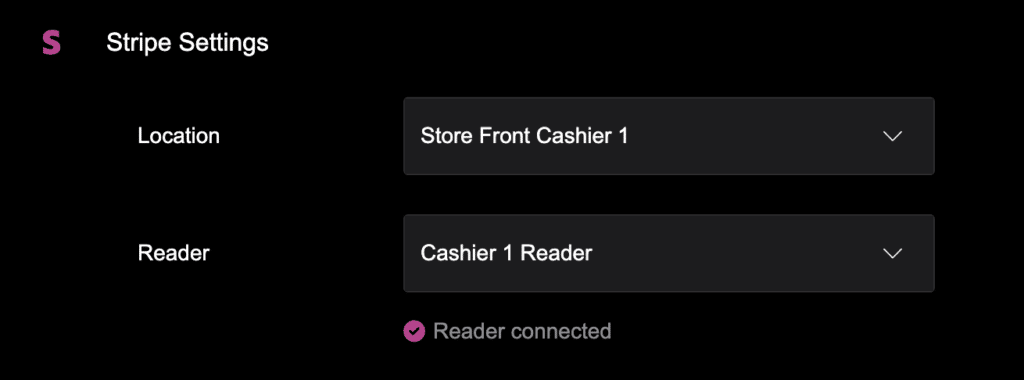
Once the reader has been successfully registered, FooEvents POS will automatically connect to it so that it can be used to process cards at checkout.
Processing Payments
When you’re ready to complete an order in the FooEvents POS app using a registered BBPOS WisePOS™ E or Verifone P400 smart reader, select Stripe Reader as the payment method.
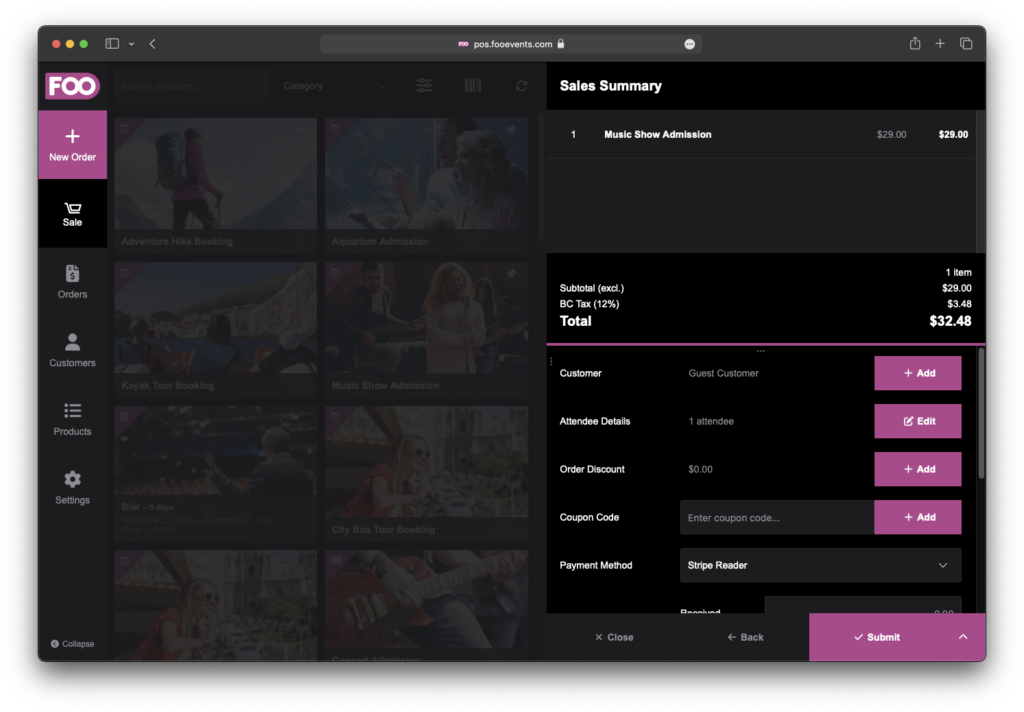
BBPOS WisePOS E Payment #
When you click the Pay button, a payment request will be sent to your connected BBPOS WisePOS™ E reader. Follow the prompts on the device to process the payment. The FooEvents POS app will wait until the checkout is successfully completed.
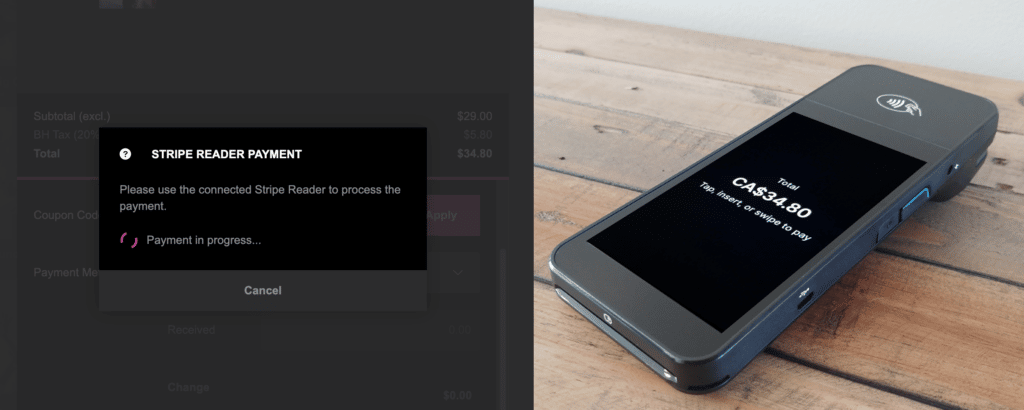
Verifone P400 Payment #
When you click the Pay button, a payment request will be sent to your connected Verifone P400 reader. Follow the prompts on the device to process the payment. The FooEvents POS app will wait until the checkout is successfully completed.
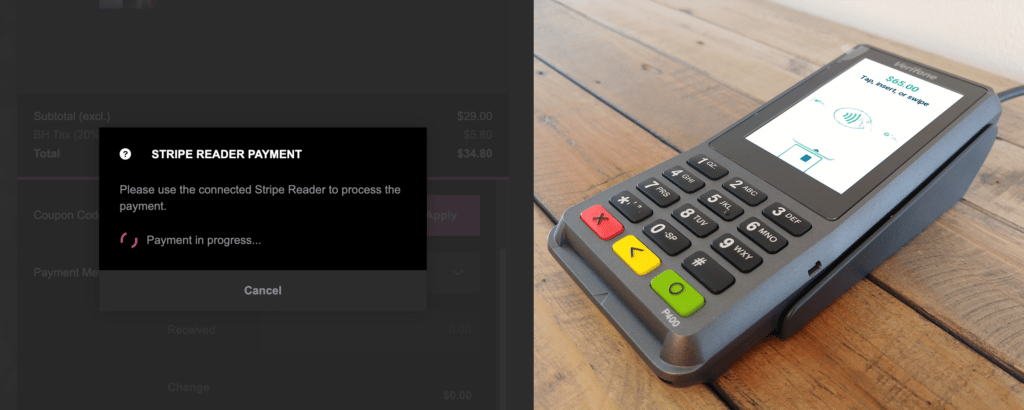
Order Completion #
Once the payment has been successfully completed, FooEvents POS will submit the order to your WooCommerce database. The Stripe payment will be linked to the WooCommerce order. If you open the completed order on the Orders screen, you will see the payment method highlighted if Stripe was used to process the payment. Tapping on this text will open the linked Stripe payment in a browser window for your convenience.
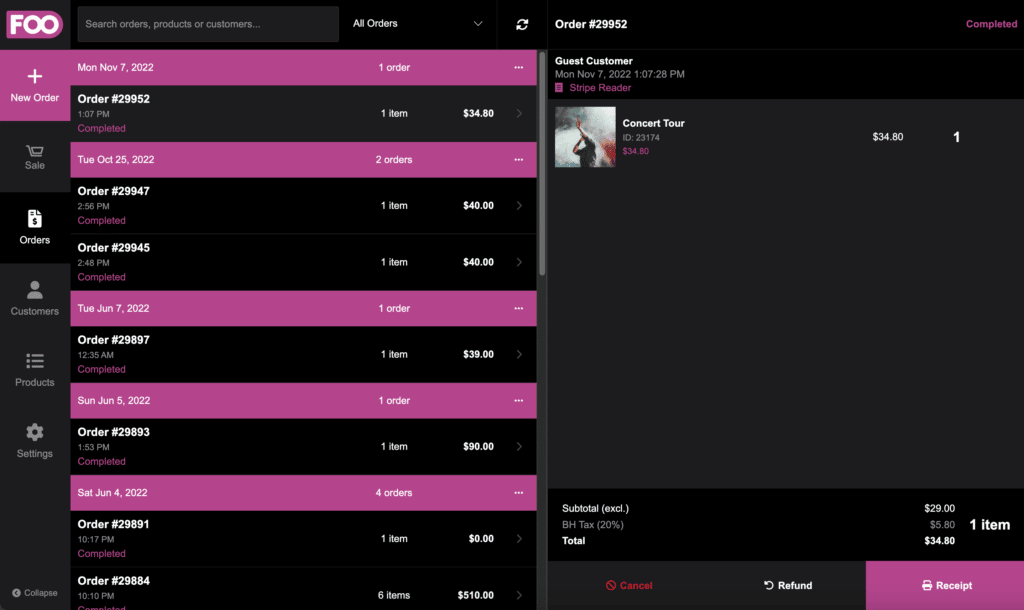
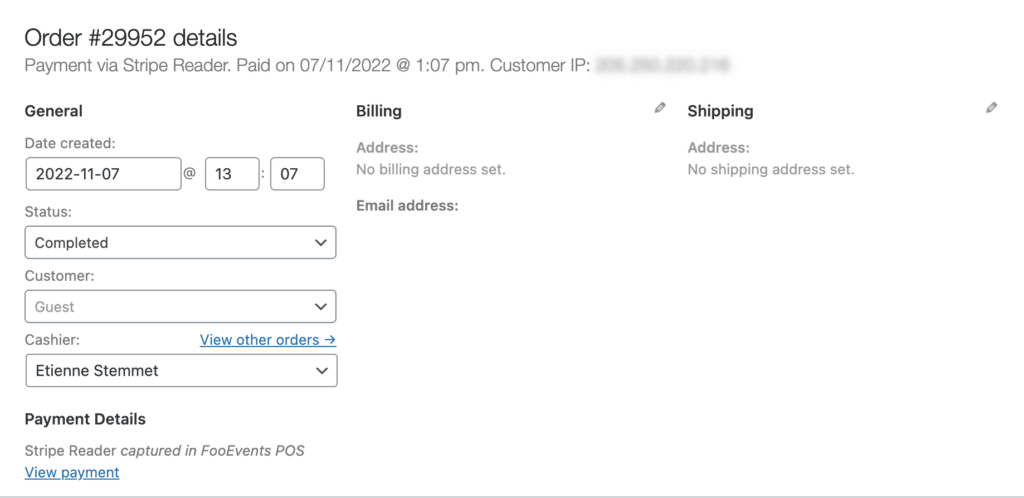
If you navigate to the WooCommerce order in your WordPress dashboard, you will see the payment method marked as Stripe Reader along with a link to View the payment in a new browser window.
Processing Payments Manually
If you do not have a Stripe Reader S700, BBPOS WisePOS™ E or Verifone P400 smart reader, you can still capture card details manually at checkout in order to process a payment for an order. Set up at least one Stripe Reader Location, and then select Stripe Manual Payment as the payment method.
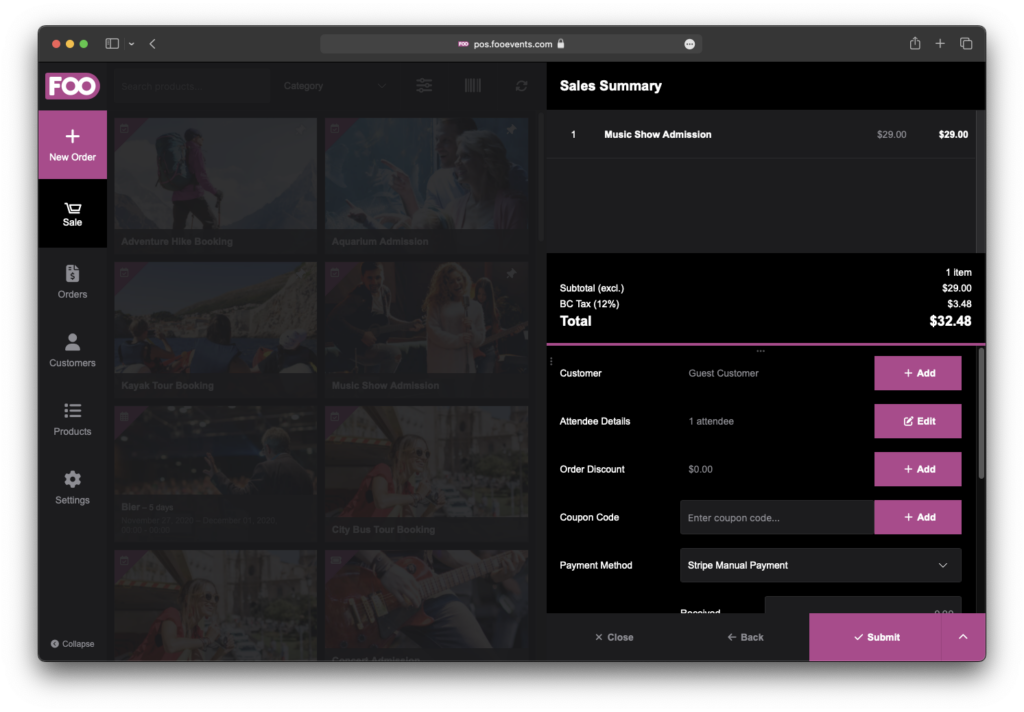
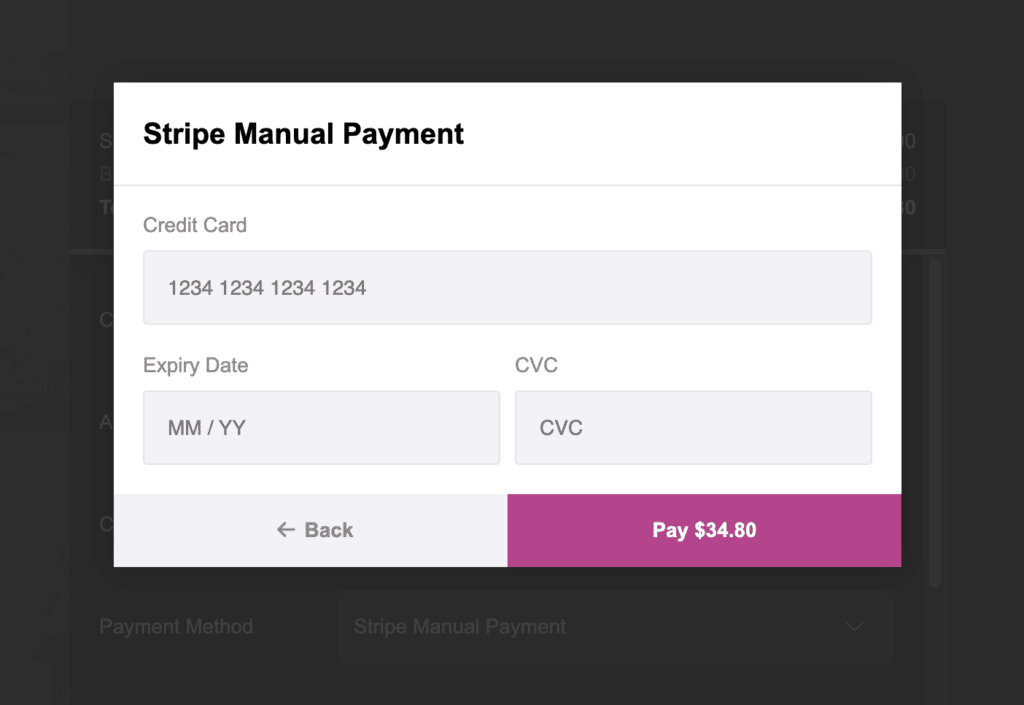
When you click the Pay button, a form will appear that allows you to enter the card number, expiry date and CVC in order to process the payment. Once the payment has been successfully submitted, FooEvents POS will complete the order and submit it to your WooCommerce store.
Refunding an Order
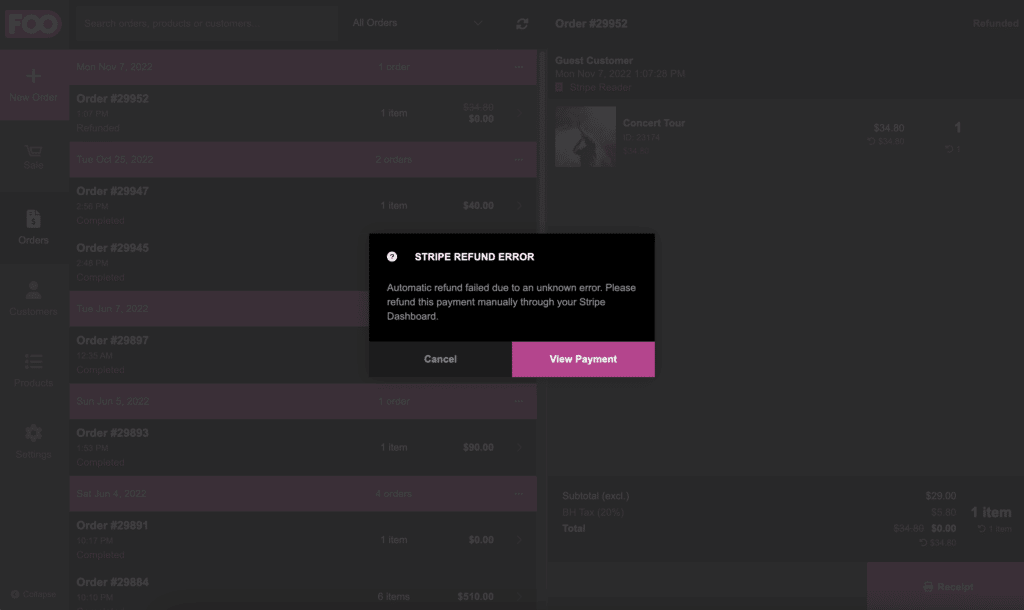
If you refund an order in FooEvents POS, the Stripe payment will be automatically refunded to the card that was originally used. If the refund fails for some reason, the order status will be changed to Refunded in WooCommerce and an error message will be displayed that allows you to view the transaction and refund the payment manually through the Stripe Dashboard. Please note: Refunding an order manually through WooCommerce will not automatically refund the Stripe payment. If you would like to refund an order from your WordPress dashboard instead of FooEvents POS, you will need to click on the View transaction link in the order view to open and manually refund the payment through your Stripe Dashboard and then set the WooCommerce order status to Refunded.
BBPOS WisePOS E Refunds #
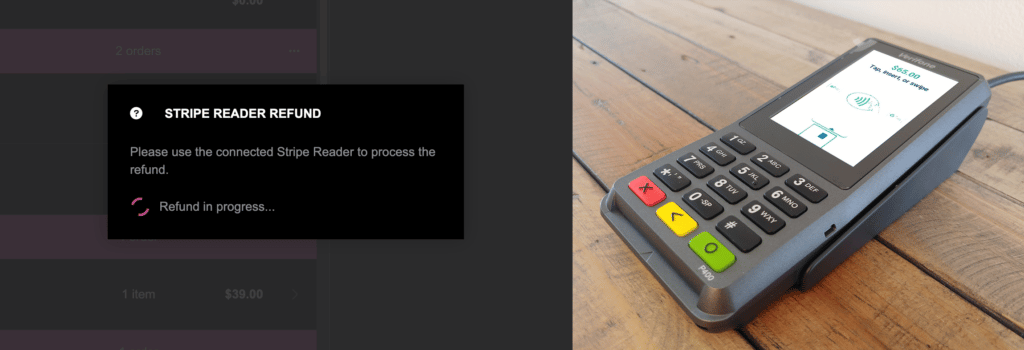
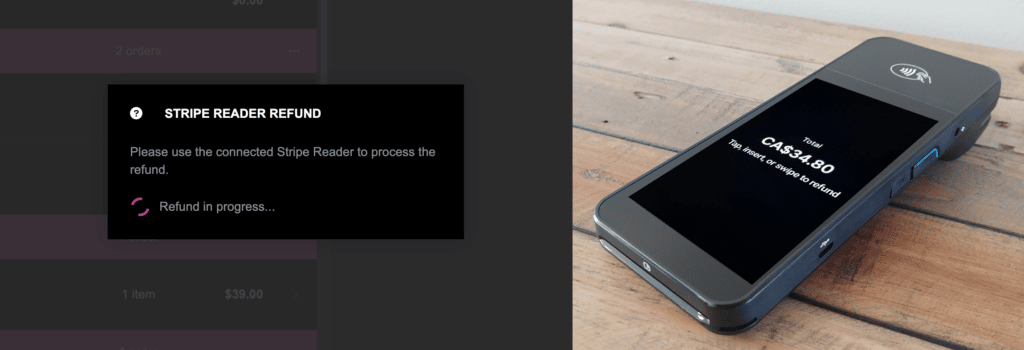
If you originally processed the payment through a connected BBPOS WisePOS™ E reader and the original card needs to be presented, a refund request will be sent to the connected device and the FooEvents POS app will wait until the refund has successfully completed.
Verifone P400 Refunds #
If you originally processed the payment through a connected Verifone P400 reader and the original card needs to be presented, a refund request will be sent to the connected device and the FooEvents POS app will wait until the refund has successfully completed.
