Requires the FooEvents Calendar plugin
The FooEvents Calendar plugin makes it possible to display your events in a stylish calendar on your WordPress website. Calendars can be displayed using simple shortcodes or widgets. Using the FooEvents Calendar plugin, you can convert any post, page or custom post type into an event and display it in a calendar view.
The FooEvents Calendar plugin is fully compatible with FooEvents for WooCommerce plugins, making it possible to create more advanced events and sell branded tickets with no commission or ticket fees directly from your own WordPress website. FooEvents offers many pro features that add advanced event management functionality to your website including free email ticket themes and check-ins apps.
Sections #
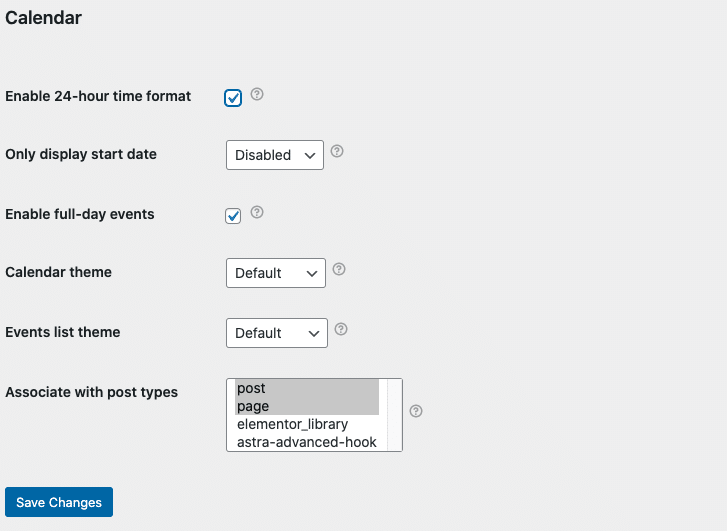
FooEvents Calendar Settings

- Go to your WordPress admin area
- Navigate to FooEvents > Settings > Calendar
- Various settings can be configured that will change the behavior and display of your calendar
Calendar colors
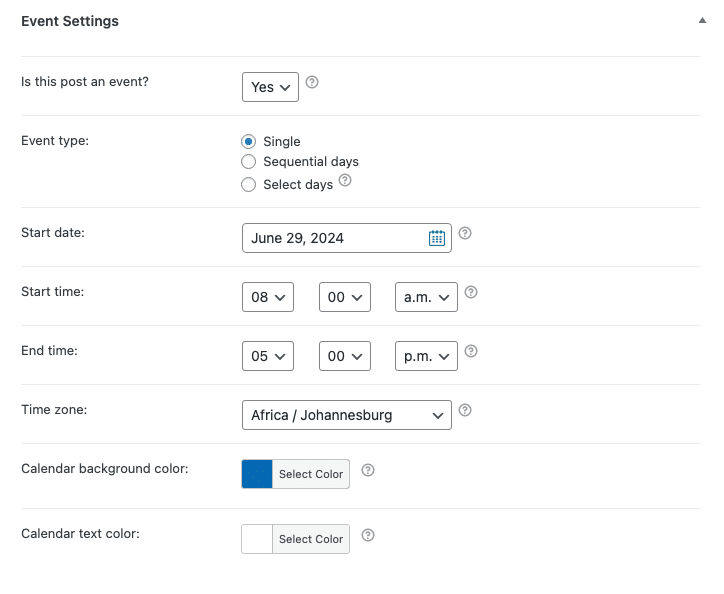
You can set an individual background and text color for each event. The event name will use these colors when displaying in the calendar grid view. These settings also change the background and text color of the date icon in the FooEvents Check-ins app. To set the calendar colors for your event, do the following:
- Go to your WordPress admin area
- Edit the event
- Click on the Event Settings tab
- Select a color for Calendar background color
- Select a color for Calendar text color
- Update your event
Calendar shortcodes
Visit the Shortcodes section for further details.
Adding a widget view of the calendar

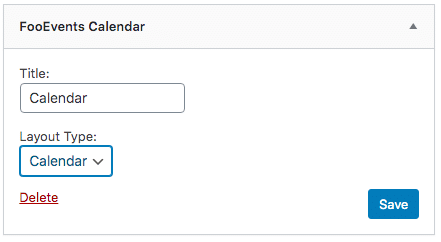
- Go to Appearance > Widgets
- Drag the FooEvents Calendar widget into the widget area where you would like it to display
- Type a widget title
- Select which type of view you would like to use – Calendar or List
- Calendar view:
- You can specify which date you would like the calendar to start on. If left empty, the calendar will default to the current date.
- Example date format: 2016-09-01 (yyyy/mm/dd)
- List view:
- You can set the number of events to display. By default the list view will display the latest 5 events
- Click Save to confirm your changes
Displaying posts, pages and custom post types to the calendar #
Add any post, page or custom post type to your event calendars. Simply enable the relevant post types in the FooEvents settings and add event information to the relevant posts.
Enable Post types:
- Go to FooEvents > Settings > Calendar
- Select the relevant post types that should be displayed in the calendar by selecting them from the Associate with post types multi-select field.
Set posts, pages and custom post types as events:

- Edit the relevant post, page or custom post type
- Scroll down to the FooEvents Calendar settings
- Select Yes from the Is this post an event? option and enter the Start date, End date, Start time, End time, Time zone. Note: Additional options will be available if the FooEvents Multi-day plugin is installed.
- Save the page/post
FullCalendar JavaScript library
The FooEvents Calendar plugin uses the FullCalendar JavaScript library in order to generate calendar views. We will update the FullCalendar library in future plugin updates but should you wish to manually change or update the version of the library yourself, here are the steps:
- Download the latest version of the FullCalendar library: https://fullcalendar.io/download/
- Extract the .zip archive
- Copy the .js and .css files to the fooevents_calendar/js/ and fooevents/css/ directories and overwrite the existing files
NB: We strongly recommend that you create a backup of the above directories before overwriting any existing files.
Eventbrite Configuration
The FooEvents Calendar plugin can automatically create your events on Eventbrite, saving you time and effort. An “Eventbrite oAuth Token” is required in order to communicate with Eventbrite. To generate the oAuth Token, please follow these steps:
- Login to your Eventbrite account
- Navigate to Account Settings > Developer Links > Api keys
- Click on Create API Key
- Complete the form with your contact information
- For application details use the following:
- Application URL – The URL of your WordPress website
- Application name – Choose a name for your app, e.g. YOURWEBSITENAME-FOOEVENTS
- Description – e.g. “FooEvents Calendar integration”
- On the “App Management” page click on the Show API key, client secret and tokens link
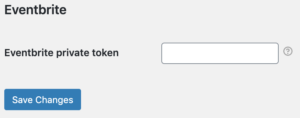
- Copy Private token
- Navigate to your WordPress admin area
- Navigate to FooEvents > Settings > Integration
- Paste Private token in the Eventbrite private token option
- Click Save Changes

NB: If configured successfully, you should now see an Add event to Eventbrite option on the Event Settings tab when editing your event.