Visit the plugin product information page or purchase it as part of a bundle
The FooEvents Bookings plugin extends FooEvents functionality by adding the ability to create bookable products such as recurring events, venue access and other bookable date and time specific services.
The FooEvents Bookings plugin can be used in a variety of different ways. It essentially gives you the ability to create bookable date and time slots which can be reserved or purchased on your website by your customers. You can also manage stock/inventory for each slot and date combination. All of this is achieved through a very intuitive drag and drop interface so there are no complicated settings!
This structure makes it possible to accommodate any event, venue or service that needs to sell access to a number of slots on single or multiple dates. For example, it can be configured to accommodate bookings for yoga classes, bus tours, ferry rides, museums, hair salons, tourist activities, training workshops, art classes, courses, music lessons, golf slots, chiropractor appointments and theme parks etc.
That said, there are a few instances where the FooEvents Bookings plugin is not currently a good fit. For example, it is not really suitable for bookings that span over multiple days, such as accommodation bookings or equipment rentals.
Sections #
How It Works #
The FooEvents Bookings plugin adds the following functionality to FooEvents:
Bookings Settings
Booking slots are managed via a drag and drop interface. This is included as a tab in the product settings.
To view these settings, navigate to:
WordPress Admin Area > Products > Edit Product > Product Data tabs > Bookings Settings
Display Options
These are located in the Event Settings tab and determine how the slots are displayed on the site.
To view these settings, navigate to:
WordPress Admin Area > Products > Edit Product > Product Data tabs > Event Settings (Scroll down to the bottom)
Booking Selection
Attendees will select the slot they will attend when purchasing a product. By default, the selection options are included on the checkout page and consist of two drop-down menus for the slot name and date. These options can also be enabled on the product page where attendees will be required to select a booking slot when adding the item to their cart.
Ticket Display
Booking details are included in both HTML and PDF tickets.
FooEvents Check-ins Integration
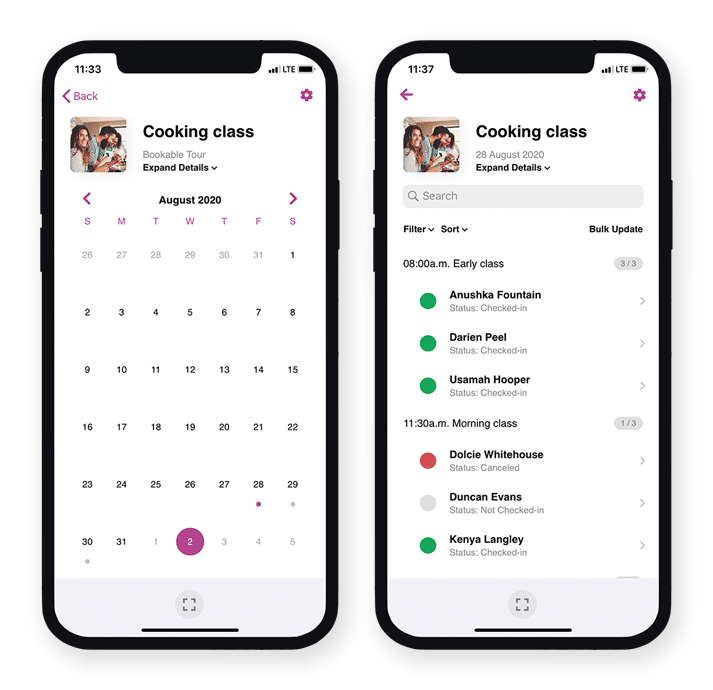
Bookable events function differently to other events when viewed in the app and make use of custom screens that make managing bookings much simpler.
Download the free FooEvents Check-ins app
Create a Bookable Product #
First create a standard event using FooEvents. Complete the generic fields and settings as needed and make sure that the product is set to Virtual and Downloadable.
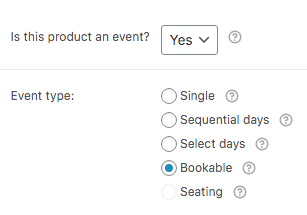
Once your event is ready, go to the Product Data tabs and select Event Settings. Select the Bookable event type.
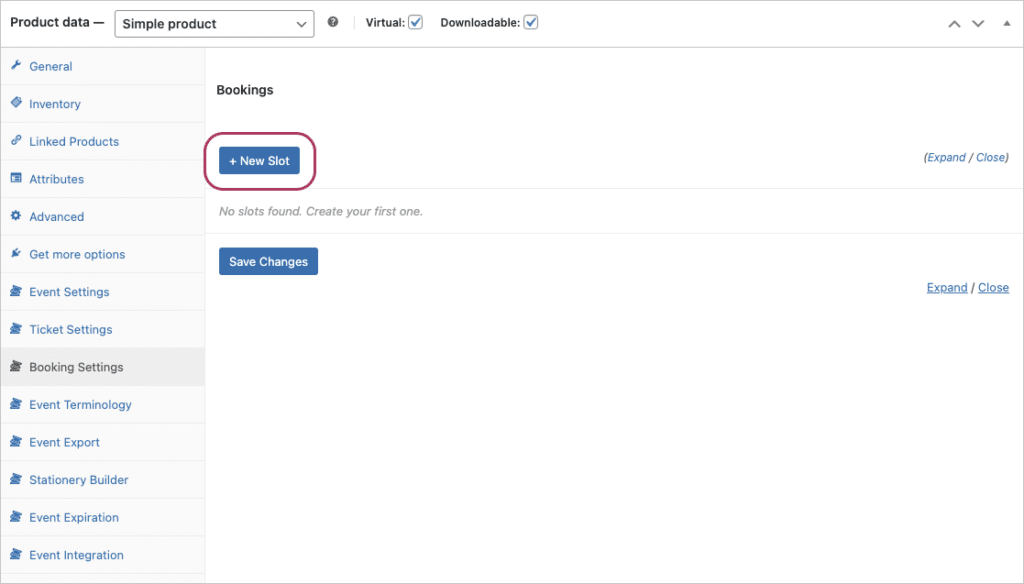
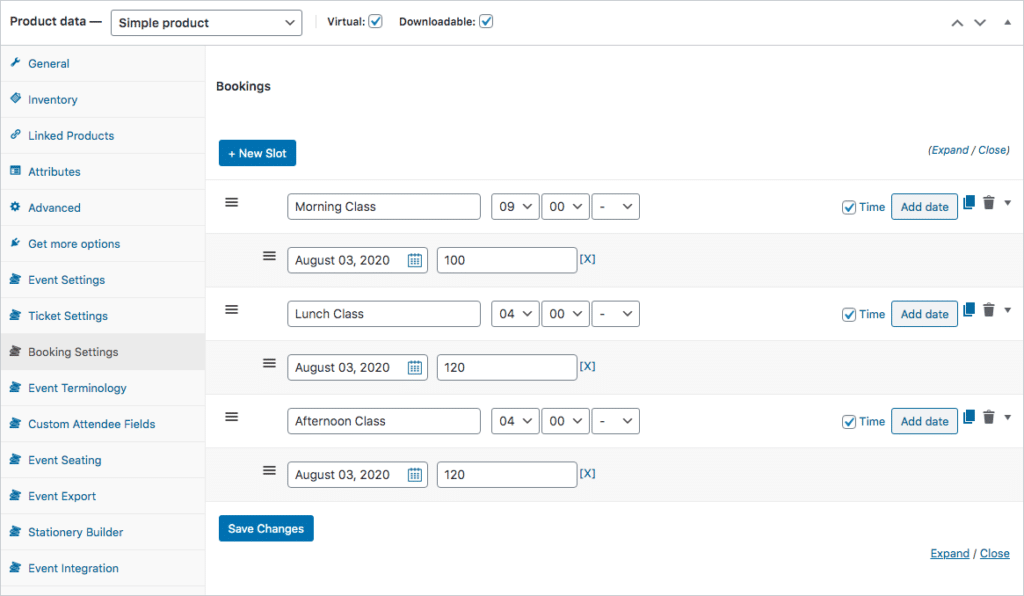
Go to the Booking Settings tab and create a new slot by selecting the + New Slot button.
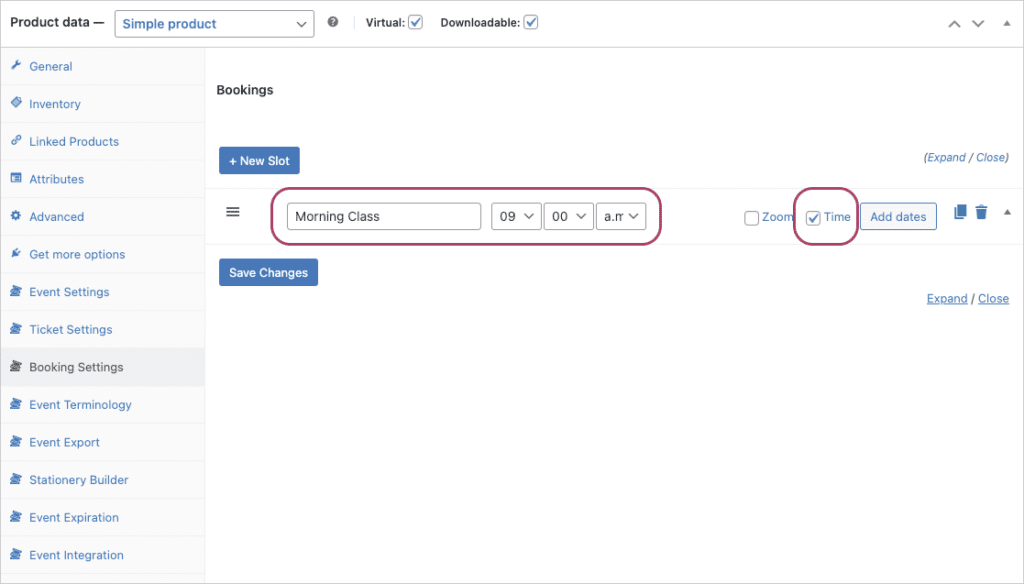
Enter a name for the slot label (e.g. Morning Class) and, if required, enable the time fields by checking the Time option.
Press the Add Dates button to open the Booking Wizard interface. Here you can generate bookable date slots by selecting the Start Date, End Date, Days of the week, and Default stock ability.
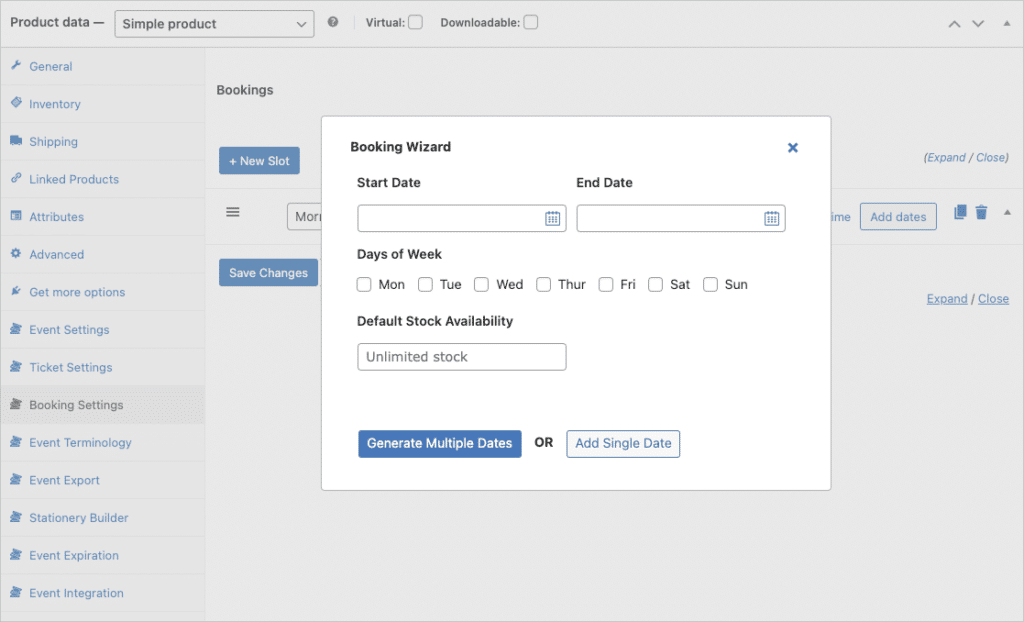
When pressing the Generate Multiple Dates button, the Booking Wizard will generate date slots for all days between the Start Date and End Date which fall on the selected days of the week.
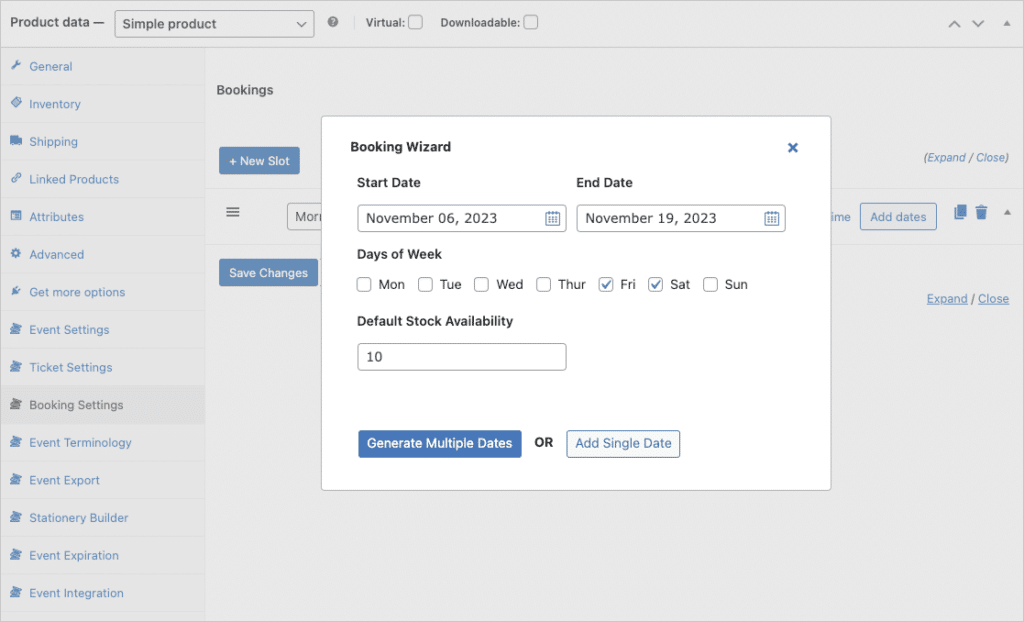
The End Date should be within a maximum of 6 months from the Start Date each time you create new slots.
You can also use the Add Single Date button to add a single date slot at a time.
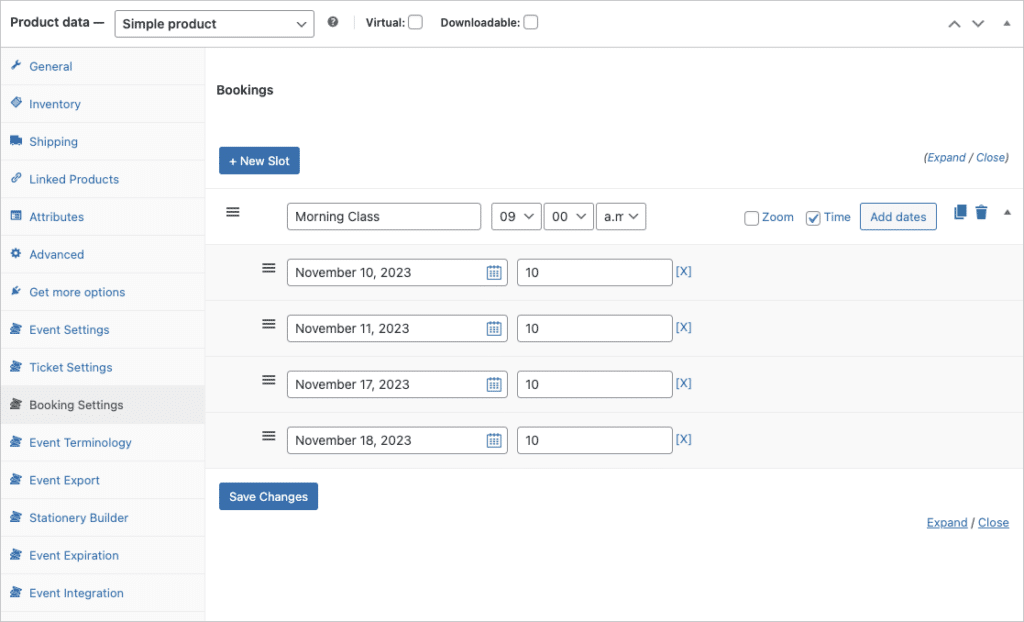
Once you have created your first slot with corresponding dates, you can either create a new slot or copy the existing slot using the Copy option. The copy option will duplicate the entire set which can then be modified as needed. This will save time should the slot occur on the same or similar dates (e.g Afternoon Class).
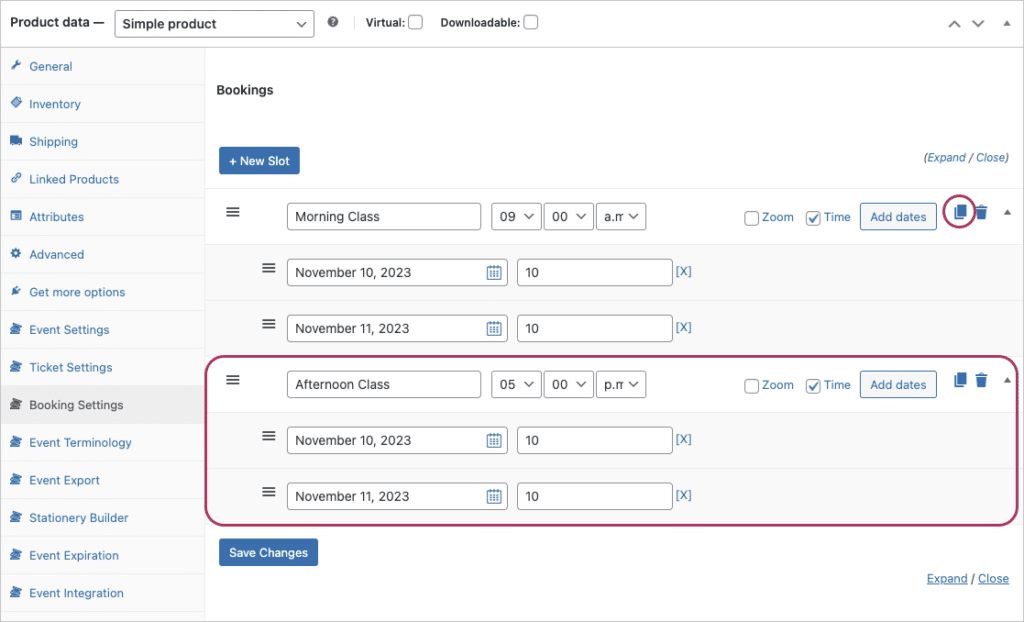
Once you have created all the slots and their corresponding dates, save the changes by clicking the Save Changes or Update button and your booking slots will then be displayed on the checkout page.
Stock Management #
Stock is managed on a date level. This means that you can manage stock separately for each day that the slot is available. Stock can be set to the following:
- Unlimited – If the stock field is left empty for a specific date it will not be managed or limited for that specific day.
- Zero – When all stock has been exhausted for a specific day it will reflect as ‘0’. This means that no further bookings will be allowed for this date and the option will no longer display in the booking drop-down selectors.
- Numeric Value – Set the amount of spaces available by specifying a positive number (e.g. 250). When a booking is made, this number will automatically be deducted.
If you do not require the ability to manage stock on a slot/date level, you can make use of the standard WooCommerce product and variation stock functionality. To do so, you will simply need to configure the slots to use unlimited stock and then use the display options in the Event Settings to hide the booking stock availability notices. Please note that doing this will mean that the slots will share stock from the same stock pool and stock will not be limited on an individual slot/date level.
Custom Terminology #
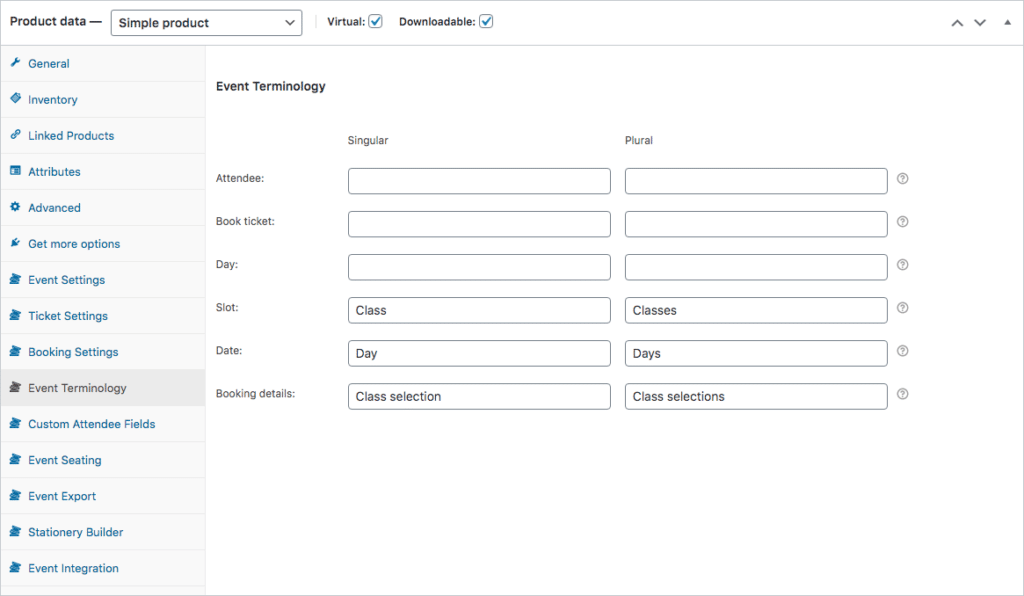
You can customize the terms that are used to describe bookings. Go to the Product Data tabs and select Event Terminology. Select the Bookable event type.
Here you can change the following:
- Slot – e.g. Class
- Date – e.g. Day
- Booking Details – e.g. Class Selection
Event Display Settings #
Go to the Product Data tabs and select Event Settings. Scroll down to the booking display options.
Bookings selection order #
Displays the order of bookings drop-down selectors as either Slot then Date OR Date then Slot.
Display booking slots and dates on the Product page, Checkout page, or both pages #
Display the booking selection options on the product page, checkout page, or both the product and checkout pages. If set to display on the product page, the booking selection will be saved and carried over to the checkout page. Adding the booking slot to a cart does not reserve the slot. It is only booked and reserved once the payment is successful and the order status is changed to ‘Complete’.
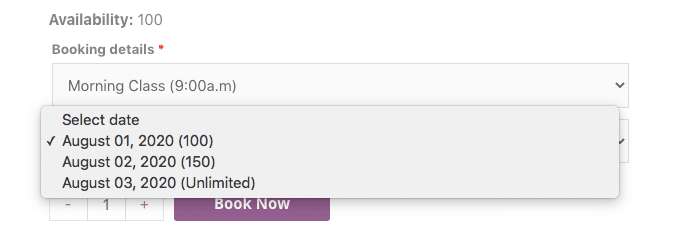
Hide Booking Time in the Slot Drop-down #
The slot drop-down selector includes the custom label that you entered as well as the slot time. If you do not wish to display the slot time in the selector or you would like to include it in the label name instead, you can disable the display of the time using this option.

Hide Stock Availability Notice #
This will hide the availability notice that is displayed above the slot selection options. This is useful for a number of difference use cases such as:
- All slots are configured to use unlimited stock and therefore stock availability is not needed
- Stock is managed using the product or variation stock. In this instance, you can simply set the slots to use unlimited stock as this will ensure that stock is not restricted by the slots.
Show Stock Availability in the Date and Slot Drop-down #
You can include the amount of stock available for each slot within the date drop-down selector by enabling this option.
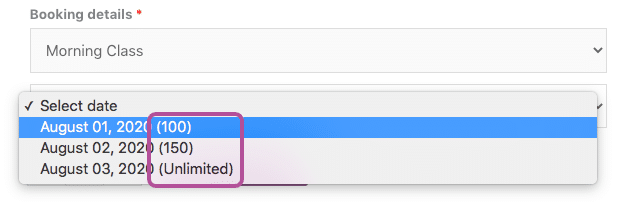
Show out of stock booking dates #
By default, if a date has no stock remaining then FooEvents will not display it in the date drop-down selector. This option can be enabled to ensure that FooEvents displays dates that do not have stock.
Bookings Expiration #
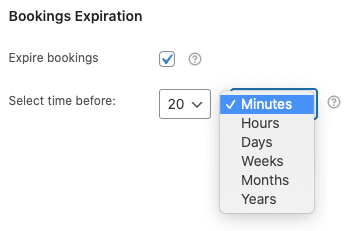
Go to the Product Data tabs and select Event Expiration. Scroll down to the Bookings Expiration section.
Enable the option ‘Expire bookings‘ and set the booking to expire a set amount of time before the booking date/time. This will ensure that any expired/elapsed booking dates will be automatically hidden from customers on your website, regardless of the amount of stock remaining.
Automatic Display Modes #
In most cases, the FooEvents Bookings plugin will display separate slot and date drop-downs on the product and checkout pages. However, there are instances where it would be more appropriate to only display a single combined drop-down. If your bookable events only occur on a single day, or should your event only make use of single slot, the date and slot drop-downs will merge into a single drop-down.
Please note that you need to keep the Bookings selection order to the default value of “Slot -> Date” if you want to use the Automatic Display Modes as using “Date -> Slot” will always display two Booking Details drop-down fields.
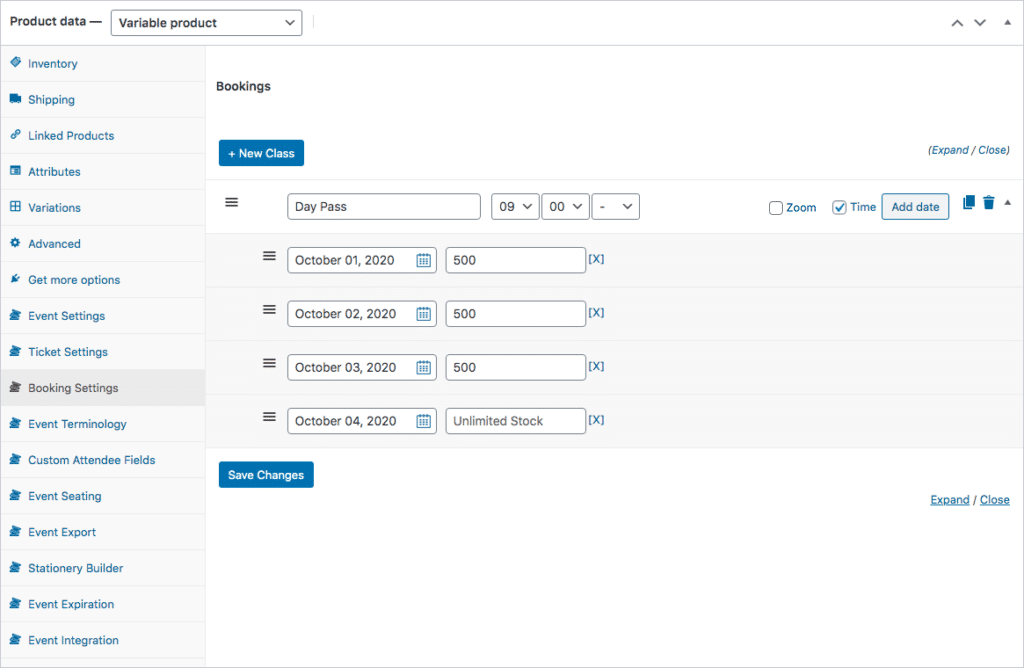
Single-slot over multiple dates #
If your event spans multiple days and does not require multiple selectable slots, the date/time drop-down fields will merge into a single drop-down field. This is done automatically.

Multiple slots for the same date #
If only a single date is set for each slot (e.g. single-day event with multiple slots), the date/time drop-down fields will be merged into a single drop-down field making selection easier for your attendees. This is done automatically.

Booking Order Statuses #
- Navigate to FooEvents > Settings in the left sidebar of your WordPress admin area
-
Select the General tab and scroll down to the Send on order status option
-
Select the relevant status/es using the multi-select box and click Save Changes
Managing Bookings #
To view tickets/bookings, navigate to WordPress Admin Area > FooEvents > Bookings. Here you can filter bookings by event, slot, and date.
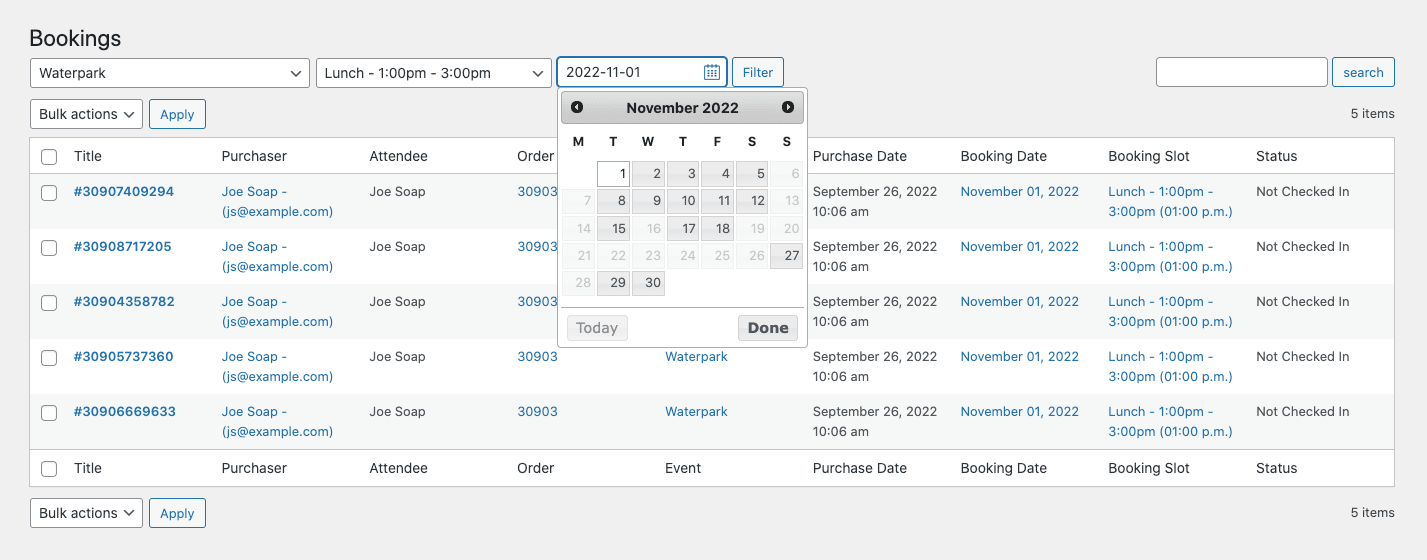
Please note: Only Bookings that were created after the FooEvents Bookings plugin was updated to version 1.4.0 can be filtered down to date level. Bookings made before version 1.4.0 do not include a custom field called ‘WooCommerceEventsBookingDateTimestamp‘ which is used by the filters. You can add this custom field to past bookings by running a script that adds the custom field to all bookings/tickets that were generated before version 1.4.0. To make it easier for you to do this, we have created a simple plugin that will allow you to run the updates in batches. If you would like to proceed and add the timestamp custom field to previous tickets, please follow these steps.
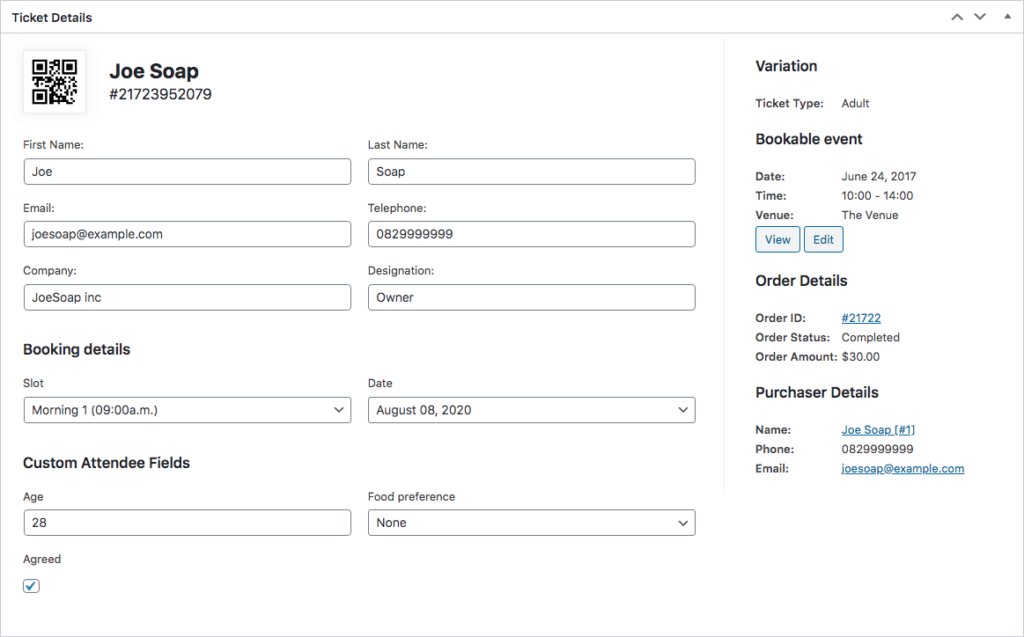
You can modify a booking by selecting the booking title/ID. You can then change both the attendee information as well as the booking slot and date.
You can find out more information about FooEvents Tickets in the Help Center.
You can manage booking attendance using the free FooEvents Check-ins app. Bookable events function differently to other events when viewed in the app and make use of custom screens that make managing bookings much simpler. Tickets can also be scanned using the app to speed up the check-in process.
Calendar #
Booking slots will automatically appear in the FooEvents Calendar. A separate entry is included for each date and time instance. When selected, the product page will be displayed and booking details will reflect the date and slot of the item that was selected on the calendar.
Tickets #
Tickets for bookable events show the booking slot, date and time of the booking. If these details do not appear in your tickets, make sure that you have the latest ticket template by downloading it from the FooEvents Ticket Themes Gallery.
